When it comes to maintaining your riding mower, the drive belt is the unsung hero, quietly keeping everything moving smoothly. But just like any other component, it needs regular attention to ensure it’s doing its job effectively.
So, if you’ve noticed any slipping, squeaking, or wear and tear, it might be time to give your drive belt a thorough once-over. But how exactly do you go about checking and adjusting it?
Well, let’s walk through the process together and make sure your mower stays in top condition.
Understanding the Drive Belt’s Function
The drive belt on your riding mower transfers power from the engine to the wheels, enabling the mower to move forward and backward.
This essential component is responsible for transmitting the engine’s power to the transmission system, which then propels the mower.
When you engage the mower’s blades, the drive belt also transfers power from the engine to the cutting blades, allowing them to rotate and cut grass.
Without a functioning drive belt, your riding mower would be unable to operate, as power from the engine wouldn’t reach the wheels or blades.
Understanding the drive belt’s function is crucial for maintaining and troubleshooting your riding mower. Regular inspection and maintenance of the drive belt can prevent unexpected breakdowns and ensure smooth operation of your mower.
By learning about the role of the drive belt, you can better appreciate its importance and know when to check for wear and tear or when to adjust its tension.
This knowledge empowers you to keep your riding mower in top working condition.
Tools Required for Inspection
To properly inspect the drive belt on your riding mower, you’ll need a few basic tools to ensure a thorough assessment and maintenance.
Here’s a list of essential tools for inspecting and adjusting the drive belt:
| Tools Required | Purpose |
|---|---|
| Socket wrench | Used to remove the mower deck for easy access to the drive belt. |
| Screwdriver | Helps in loosening or adjusting the belt tension for proper functioning. |
| Work gloves | Protects your hands during the inspection and maintenance process. |
Having these tools ready will make the inspection process smoother and more efficient. Ensure that the socket wrench fits the specific size of the bolts on your mower deck, and the screwdriver is compatible with the tension adjustment mechanism.
Additionally, wearing work gloves will not only protect your hands but also provide a better grip when handling the belt and mower components.
With these tools at hand, you can confidently proceed with the drive belt inspection and make any necessary adjustments to keep your riding mower in optimal condition.
Steps for Checking the Drive Belt
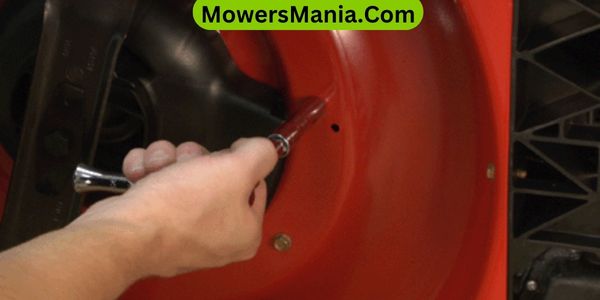
When inspecting the drive belt on your riding mower, start by locating the belt tension adjustment mechanism. This is usually a knob or bolt that adjusts the position of the pulleys to tighten or loosen the belt.
Once you’ve located the adjustment mechanism, engage the parking brake and remove the ignition key to ensure safety. Look for the belt routing diagram, usually located on the mower deck or in the owner’s manual, to understand the correct path of the belt.
Inspect the belt for any signs of wear, such as cracks, fraying, or stretching. If you notice any damage, it’s important to replace the belt to prevent any issues with the mower’s performance.
Next, check the tension of the belt by pressing on it with your finger. The belt should have a slight give, but it shouldn’t be overly loose. If the belt is too loose or too tight, use the adjustment mechanism to achieve the proper tension.
Lastly, ensure that the belt is aligned properly on all the pulleys before testing the mower.
Adjusting the Tension of the Drive Belt
Once you’ve located the adjustment mechanism for the drive belt tension, ensure it is accessible and can be easily adjusted using a wrench or socket. The tension adjustment mechanism can typically be found near the engine or the mower deck.
Use the following table as a reference to adjust the tension of your drive belt:
| Step | Action |
|---|---|
| 1 | Park the mower on a flat, level surface and engage the parking brake. |
| 2 | Locate the adjustment nut or bolt on the tension adjustment mechanism. |
| 3 | Use a wrench or socket to loosen the adjustment nut or bolt. |
| 4 | Adjust the tension by moving the mechanism to increase or decrease the tension on the belt. |
| 5 | Once the desired tension is achieved, tighten the adjustment nut or bolt securely. |
After adjusting the tension, check the belt for proper alignment and ensure it is sitting correctly in the pulley grooves.
Additionally, inspect the belt for any signs of wear or damage and replace it if necessary. Adjusting the tension of the drive belt ensures optimal performance and longevity of your riding mower.
Replacing a Worn or Damaged Drive Belt
If your riding mower’s drive belt shows signs of wear or damage, it’s essential to replace it promptly to maintain the mower’s functionality and prevent further damage.
Here’s how to replace a worn or damaged drive belt on your riding mower:
-
- Park your riding mower on a flat, level surface and engage the parking brake.
- Turn off the engine and remove the key.
- Allow the engine to cool down before proceeding.
Locate the Drive Belt:
- Consult your mower’s manual to locate the drive belt.
- It’s typically found on the mower’s deck or transmission.
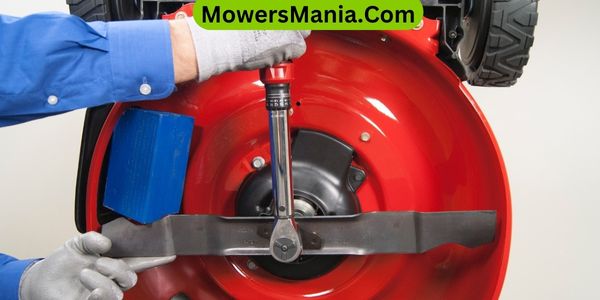
Remove the Old Belt:
- Loosen the belt tension and carefully slide the old belt off the pulleys.
- Take note of how the belt is routed for the installation of the new one.
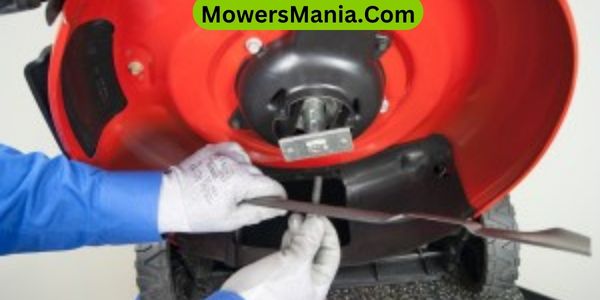
Install the New Belt:
- Route the new belt onto the pulleys following the same path as the old belt.
- Ensure the belt is properly seated in all pulley grooves.
Tighten the Belt:
- Adjust the belt tension as per your mower’s manual.
- Check for proper tension by gently pressing on the belt midway between pulleys.
Test the Mower:
- Start the engine and engage the mower blades to ensure the new belt operates smoothly.
Frequently Asked Questions [FAQs]
Can I Use a Different Type of Belt for My Riding Mower if the Original One Is Not Available?
If the original belt for your riding mower isn’t available, it’s important to find a replacement that matches the specifications of the original belt in terms of size, material, and design to ensure proper functioning of the mower.
What Are the Signs of a Drive Belt That Is About to Fail?
If your drive belt is about to fail, you might notice unusual noises, burning smell, or the mower not moving smoothly. Keep an eye out for fraying or cracking as well. Regularly checking and replacing the belt can prevent bigger issues.
How Often Should the Drive Belt Be Inspected and Adjusted?
You should inspect and adjust the drive belt on your riding mower at least once a year. Regular maintenance ensures optimal performance and prevents unexpected breakdowns. Look for signs of wear and proper tension during the inspection.
Can I Use a Belt Dressing or Lubricant on the Drive Belt to Extend Its Lifespan?
You shouldn’t use belt dressing or lubricant on the drive belt of your riding mower to extend its lifespan. Doing so can cause damage and reduce the belt’s effectiveness, leading to potential safety hazards.
Is It Possible to Over-Tighten the Drive Belt, and What Are the Consequences if I Do?
If you over-tighten the drive belt on your riding mower, it can cause excessive wear on the belt and the pulleys. This can lead to premature failure of the belt and potential damage to the mower’s components.
Conclusion
So, now you know how to check and adjust the drive belt on your riding mower.
By understanding its function, using the right tools, and following the steps for inspection and adjustment, you can ensure that your mower runs smoothly and efficiently.
And if you ever need to replace a worn or damaged belt, you’ll be prepared to do so.
Keep up with regular maintenance to keep your mower in top condition.

