
Are you having trouble with your Craftsman riding lawn mower? Is it not running smoothly or starting up easily? Well, fear not!
In this article, we will guide you through the process of cleaning the carburetor, a common culprit for these issues.
By following our simple steps and using the necessary tools, you’ll have your lawn mower running like new in no time.
So, let’s get started!
Gather Necessary Tools and Materials
To gather the necessary tools and materials for cleaning the carburetor on your Craftsman riding lawn mower, you’ll need to take the following steps.
First, make sure you have a few basic tools at hand. Grab a pair of pliers to remove the carburetor, a screwdriver to disassemble it, and a small brush to clean it thoroughly.
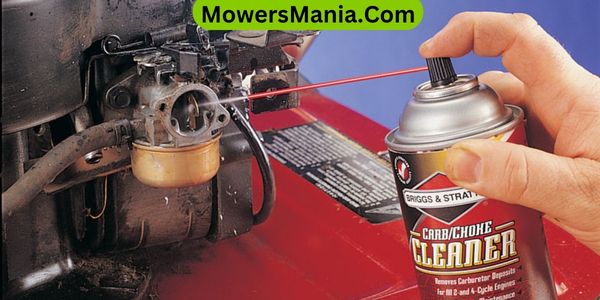
You may also need a can of carburetor cleaner, which can be found at any hardware store or automotive shop. Additionally, have some clean rags or towels ready to wipe away any dirt or residue.
It’s also a good idea to wear protective gloves to keep your hands clean and safe throughout the process.
Once you have gathered all the necessary tools, it’s time to move on to the materials. Make sure you have a clean and well-lit workspace, preferably outdoors to allow for proper ventilation.
It’s also important to have a container or a tray to hold the small parts of the carburetor as you disassemble it. This will prevent them from getting lost or misplaced.
Lastly, have a can or bottle of fresh gasoline on hand to test the carburetor’s functionality once you have cleaned it.
Prepare the Lawn Mower for Carburetor Cleaning
Now, you’ll need to remove the air filter cover to access the carburetor. Start by locating the air filter cover on your Craftsman riding lawn mower.
It’s usually located on the side or top of the engine. Once you have located it, use a screwdriver or a wrench to remove the screws or bolts that hold the cover in place. Carefully lift off the cover and set it aside.
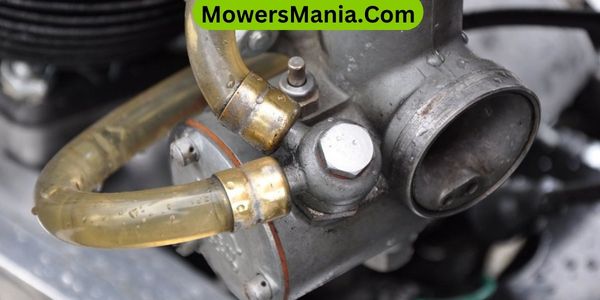
With the air filter cover removed, you’ll now be able to see the carburetor. Take a moment to inspect the area around the carburetor for any debris or dirt that may have accumulated.
Use a brush or compressed air to clean the area, ensuring that no dirt or debris falls into the carburetor. It’s important to have a clean work surface before proceeding with the carburetor cleaning process.
After cleaning the area around the carburetor, take a moment to inspect the condition of the air filter. If it’s dirty or damaged, now would be a good time to replace it.
A clean air filter is essential for the proper functioning of the carburetor and the overall performance of your lawn mower.
Now that you have prepared the lawn mower by removing the air filter cover and inspecting the area around the carburetor, you’re ready to move on to the next step of cleaning the carburetor.
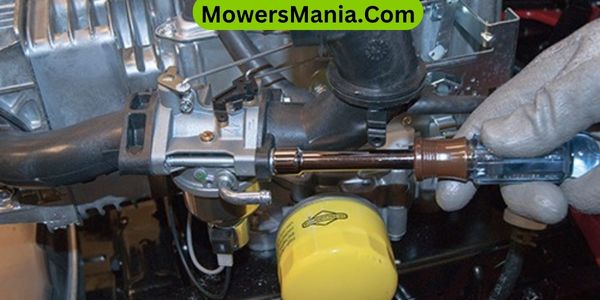
Remove and Disassemble the Carburetor
First, carefully disconnect the carburetor from your Craftsman riding lawn mower using a wrench or pliers. Removing and disassembling the carburetor is an important step in cleaning it thoroughly.
Here are three key things to keep in mind during this process:
- Take note of the carburetor’s position: Before removing it, make a mental note or take a picture of how the carburetor is positioned on the mower. This will help you remember the correct orientation when it’s time to reassemble it.
- Remove the carburetor: Locate the bolts or screws holding the carburetor in place and use the appropriate tool to loosen and remove them. Gently lift the carburetor away from the engine, being mindful of any attached fuel lines or linkages.
- Disassemble the carburetor: Once the carburetor is removed, carefully disassemble it by removing the screws or clips holding the different components together. Take note of the order in which the parts are removed, as this will make reassembly easier later on.
Clean the Carburetor Components
To clean the carburetor components on your Craftsman riding lawn mower, start by removing any dirt or debris using a soft brush or compressed air.
Over time, dirt and debris can accumulate in the carburetor, causing it to clog and affect the performance of your mower. By cleaning the carburetor components regularly, you can ensure that your lawn mower runs smoothly and efficiently.
Begin by disconnecting the spark plug wire to prevent any accidental starting. Next, locate the carburetor on your mower.
It’s usually situated near the air filter and has various components such as the fuel bowl, float, and jets. Carefully remove these components one by one, taking note of their position.
Once the components are removed, inspect them for any signs of dirt or residue buildup. Use a soft brush or compressed air to remove any dirt or debris.
Be thorough in your cleaning, ensuring that all the tiny passages and jets are free from any obstructions. Pay special attention to the fuel bowl and float, as these are often prone to clogging.
After cleaning, reassemble the carburetor components in the reverse order of how you removed them. Make sure everything is tightened properly and securely. Finally, reattach the spark plug wire and start your mower to ensure everything is working correctly.
Reassemble and Reinstall the Carburetor
To properly reassemble and reinstall the carburetor, ensure that all the cleaned components are securely and correctly positioned back into place.
Follow these steps to successfully complete the reassembly and reinstallation process on your Craftsman riding lawn mower:
- Align the gasket:
Carefully place the carburetor gasket onto the mounting surface, ensuring it lines up with the screw holes. This will help create a proper seal and prevent any air or fuel leaks.
- Attach the carburetor:
Gently position the carburetor onto the mounting studs or bolts, making sure it sits flush against the gasket. Use the appropriate nuts or bolts to secure it in place, but be careful not to overtighten.
- Reconnect the fuel lines and linkage:
Reattach the fuel lines to their respective connections on the carburetor. Double-check that they’re securely fastened and there are no kinks or obstructions. Then, reconnect any linkages that were previously disconnected, ensuring they’re properly aligned and functioning smoothly.
Once you have completed these steps, you can proceed with reconnecting the spark plug wire and testing the mower to ensure the carburetor is working correctly.
Frequently Asked Questions [FAQs]
How Often Should I Clean the Carburetor on My Craftsman Riding Lawn Mower?
You should clean the carburetor on your Craftsman riding lawn mower at least once a year. It’s important to maintain the carburetor to ensure proper engine performance and prevent clogs or buildup.
Can I Use Any Type of Cleaning Solution to Clean the Carburetor Components?
Yes, you can use a cleaning solution to clean the carburetor components. However, it is important to use the right type of cleaning solution that is specifically designed for carburetor cleaning.
What Should I Do if I Accidentally Damage Any of the Carburetor Components During Disassembly?
If you accidentally damage any carburetor components during disassembly, don’t worry. You can easily replace them with new parts. Just make sure to identify the damaged component and find the appropriate replacement for it.
Is It Necessary to Replace Any Gaskets or Seals When Reassembling the Carburetor?
When reassembling the carburetor, it is necessary to replace any damaged gaskets or seals. This ensures proper sealing and prevents air leaks, which could affect the performance of your Craftsman Riding Lawn Mower.
Are There Any Specific Safety Precautions I Should Take While Cleaning the Carburetor on My Craftsman Riding Lawn Mower?
When cleaning the carburetor on your Craftsman riding lawn mower, it is important to take safety precautions. Ensure the engine is off, disconnect the spark plug wire, and wear protective gloves and eyewear.
Conclusion
In conclusion, cleaning the carburetor on your Craftsman riding lawn mower is a straightforward process that can help improve its performance and extend its lifespan.
By gathering the necessary tools and materials, preparing the lawn mower, removing and disassembling the carburetor, cleaning the components, and reassembling and reinstalling it, you can ensure that your mower runs smoothly and efficiently.
Regular maintenance and cleaning of the carburetor is essential for optimal functioning of your lawn mower.

