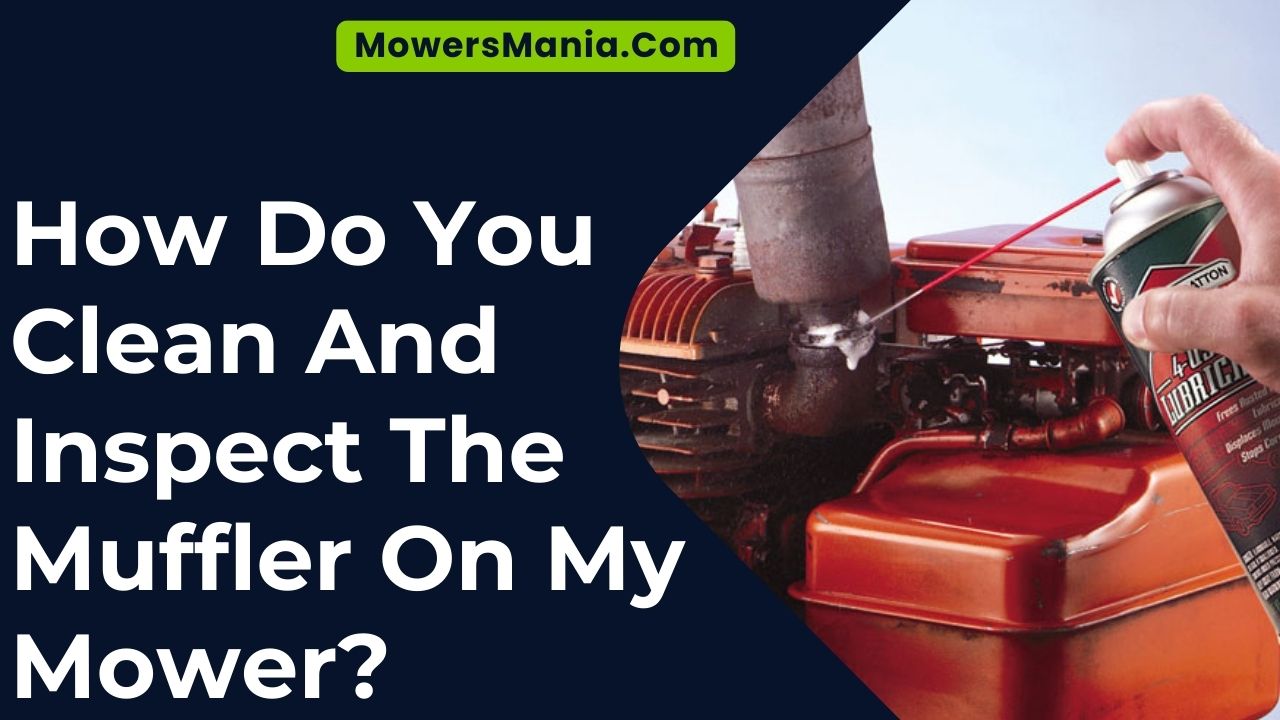
Have you ever stopped to consider the silent hero of your mower, the muffler? While often overlooked, the muffler plays a crucial role in reducing noise and directing exhaust fumes away from you while you’re working in the yard.
However, over time, it can become clogged with dirt and debris, affecting its performance.
So, how do you ensure that your mower’s muffler is clean and in good working condition?
Let’s explore the steps to clean and inspect the muffler on your mower, ensuring its optimal functioning for the long haul.
Importance of Muffler Maintenance
Maintaining your mower’s muffler is crucial for ensuring proper functioning and preventing potential fire hazards.
Over time, the muffler can become clogged with dirt, grass clippings, and other debris, hindering its ability to expel exhaust gases. This can lead to increased engine temperature and, in extreme cases, even pose a fire risk.
Regularly cleaning the muffler can prevent these issues and ensure that your mower operates safely and efficiently.
In addition to preventing fire hazards, proper muffler maintenance also contributes to noise reduction.
A clean and well-maintained muffler can help dampen the noise produced by the engine, making for a more pleasant mowing experience for both you and your neighbors.
Neglecting muffler maintenance can result in excessive noise pollution, which may lead to complaints from those around you.
Necessary Tools for Cleaning
You’ll need to gather some specific cleaning materials before starting this process. The inspection process steps are crucial, so make sure you have the right tools to complete them.
Additionally, don’t forget to consider safety precautions to protect yourself while cleaning and inspecting the mower muffler.
Cleaning Materials Needed
To effectively clean and inspect mower mufflers, you’ll need specific materials and tools to ensure thorough maintenance.
The following cleaning materials are necessary:
- A wire brush for removing stubborn debris and rust
- A mild detergent or degreaser for breaking down grease and grime
- A water hose or pressure washer for rinsing off the muffler
Additionally, you’ll require safety gloves to protect your hands from sharp edges and chemicals, as well as safety goggles to shield your eyes from any debris dislodged during cleaning.
It’s also advisable to have a flashlight on hand to inspect the muffler’s interior for any signs of damage or blockages.
With these cleaning materials, you can effectively maintain and prolong the life of your mower’s muffler.
Inspection Process Steps
When preparing to inspect your mower muffler, the wire brush, mild detergent or degreaser, and water hose or pressure washer will be essential tools for cleaning and evaluating its condition.
To begin the inspection process, ensure the engine is off and cool to the touch. Use the wire brush to remove any visible debris or rust buildup on the muffler.
Next, apply the mild detergent or degreaser to the muffler, using a cloth to scrub away any stubborn grime.
Then, rinse the muffler thoroughly with a water hose or pressure washer to remove the cleaning solution and inspect for any cracks, holes, or signs of damage. Pay close attention to the muffler’s welds and seams.
If any issues are detected, it may be necessary to seek professional assistance.
Safety Precautions to Consider
Consider using protective gloves and goggles as essential tools for your safety while cleaning and inspecting the mower muffler.
Gloves will protect your hands from dirt, grime, and potential sharp edges, while goggles will shield your eyes from debris and sparks.
Additionally, you may need a wire brush, a scraper, and a cleaning solution to effectively remove carbon deposits and dirt from the muffler. These tools will help you thoroughly clean the muffler without damaging it.
Before starting the cleaning process, ensure that the mower has cooled down completely to avoid burns or accidents.
Furthermore, make sure the mower is on a stable and level surface to prevent any mishaps while working on the muffler.
Always prioritize safety to prevent any potential injuries.
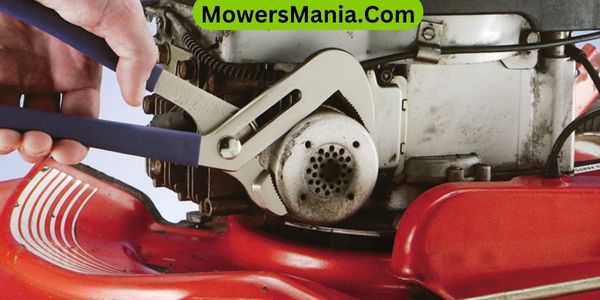
Steps for Removing the Muffler

You can start the process of removing the muffler by locating the bolts that secure it to the mower. Typically, there are two or three bolts that need to be removed.
Once you’ve located the bolts, use a socket wrench to loosen and remove them. After the bolts are removed, gently wiggle the muffler to detach it from the mower.
Be cautious as the muffler may still be hot, so it’s advisable to use gloves or wait for it to cool down before handling it further.
To simplify the steps for removing the muffler, here’s a quick reference guide:
| Steps for Removing the Muffler | |
|---|---|
| Step 1 | Locate the bolts securing the muffler to the mower. |
| Step 2 | Use a socket wrench to loosen and remove the bolts. |
| Step 3 | Gently wiggle the muffler to detach it from the mower. |
| Step 4 | Allow the muffler to cool down before further handling. |
Following these steps will help ensure that you safely and effectively remove the muffler from your mower for cleaning and inspection.
Cleaning the Muffler
When cleaning the muffler, start by removing any debris from the exterior.
Use a cleaning solution to thoroughly clean the surface and remove any stubborn residue.
This will help ensure that the muffler functions efficiently and maintains its durability.
Removing Debris
After allowing the mower to cool down, carefully remove any debris from the muffler using a brush or compressed air. Debris buildup can lead to reduced airflow and cause the engine to overheat, so it’s crucial to keep the muffler clean.
Here are three important reasons why removing debris from the muffler is essential:
- Prevention of Fire Hazards: Removing debris reduces the risk of flammable materials igniting on the hot muffler, preventing potential fire hazards in your work area.
- Optimal Engine Performance: Clearing debris ensures that the exhaust gases can flow freely, allowing the engine to operate at its best and minimizing the risk of malfunctions.
- Prolonged Muffler Lifespan: Regular cleaning prevents corrosion and deterioration, extending the lifespan of the muffler and saving you money on replacements.
Using Cleaning Solution
To ensure thorough cleaning of the muffler, begin by applying a suitable cleaning solution to help break down any stubborn residue, continuing the maintenance process from removing debris.
First, ensure the mower is completely cooled down before starting. Then, spray the cleaning solution directly onto the muffler, covering the entire surface. Allow the solution to sit for a few minutes to effectively break down any grease or grime.
Use a brush with stiff bristles to scrub the muffler, focusing on areas with heavy buildup. After scrubbing, rinse the muffler thoroughly with clean water to remove the cleaning solution and loosened residue.
Inspecting for Damage
You should carefully examine the mower muffler for any signs of cracks, holes, or rust. Inspecting for damage is crucial to ensure that the muffler is functioning properly and safely.
Here are three important things to look out for:
- Cracks: Check the entire surface of the muffler for any cracks, no matter how small. Even a small crack can lead to exhaust leaks, which can be hazardous and may also affect the performance of your mower.
- Holes: Look for any holes in the muffler. Holes can’t only affect the efficiency of the exhaust system but can also lead to increased noise levels and potential safety hazards.
- Rust: Pay close attention to any signs of rust on the muffler. Rust can weaken the structure of the muffler, making it more prone to damage and reducing its lifespan.
Reinstalling the Muffler

Once you have thoroughly inspected the mower muffler for any damage, you can proceed with the reinstallation process to ensure proper functioning.
Start by positioning the muffler in its original location on the engine. Ensure that the mounting holes on the muffler align with the corresponding studs or bolts on the engine.
Once aligned, insert and tighten the bolts or nuts to secure the muffler in place. Be careful not to overtighten, as this could damage the muffler or the engine.
After securing the muffler, reattach any components that were removed during the inspection process, such as heat shields or exhaust pipes. Make sure all connections are tight and secure to prevent any exhaust leaks.
Once everything is reinstalled, start the mower and listen for any unusual noises or vibrations. If everything sounds normal, allow the engine to run for a few minutes and check for any signs of exhaust leakage around the muffler.
Frequently Asked Questions [FAQs]
How Often Should I Clean and Inspect the Muffler on My Mower?
You should clean and inspect the muffler on your mower at least once a year. Regular maintenance helps prevent buildup and ensures proper functioning. When cleaning, make sure to remove any debris and check for any signs of damage.
Can I Use Any Type of Cleaning Solution to Clean the Muffler?
You can’t use any cleaning solution to clean the muffler. It’s important to use a solution specifically designed for cleaning mufflers. Look for one that’s safe for metal surfaces and won’t cause damage.
What Are Some Signs That Indicate the Muffler on My Mower Needs to Be Replaced?
If the muffler on your mower is producing excessive noise, emitting smoke, or showing signs of rust, it may need to be replaced. These are common signs that indicate the muffler needs attention.
Is It Possible to Clean and Inspect the Muffler Without Removing It From the Mower?
Yes, you can clean and inspect the muffler without removing it from the mower. Use a wire brush to remove debris and check for any signs of damage or corrosion. Ensure the engine is cool before starting.
Are There Any Specific Safety Precautions I Should Take When Cleaning and Inspecting the Muffler?
When cleaning and inspecting the muffler on your mower, always wear gloves and eye protection to prevent injury. Allow the muffler to cool down before touching it to avoid getting burned. Keep safety a top priority.
Conclusion
Now that you’ve cleaned and inspected your mower’s muffler, you can ensure it’s in good working condition and avoid any potential issues down the road.
Regular maintenance is key to keeping your mower running smoothly, so don’t forget to add muffler maintenance to your to-do list.
Happy mowing!

