
Hey there! Keeping your mower grass catcher clean is as important as keeping your lawn neat.
Let’s go through some simple steps to effectively clean your grass catcher. By following these steps, you can ensure that your mower works at its best and your lawn looks its finest.
So, let’s get started and make sure your grass catcher is in top-notch condition!
Importance of Regular Cleaning
Regular cleaning of your mower grass catcher is essential for maintaining its performance and prolonging its lifespan.
When the grass clippings accumulate in the catcher, they can block the airflow, causing the mower to work less efficiently. This can result in uneven grass cutting and even damage to your mower’s engine.
Additionally, the buildup of wet grass clippings can lead to rust and corrosion, shortening the lifespan of the catcher. By regularly cleaning the grass catcher, you can prevent these issues and ensure that your mower operates at its best.
Neglecting to clean the grass catcher can also lead to unpleasant odors emanating from the decomposing grass clippings.
This can make the mowing experience less enjoyable and even cause discomfort while using the mower. Furthermore, a dirty grass catcher is more likely to attract pests and insects, creating an unsanitary environment.
Removing Debris and Clippings
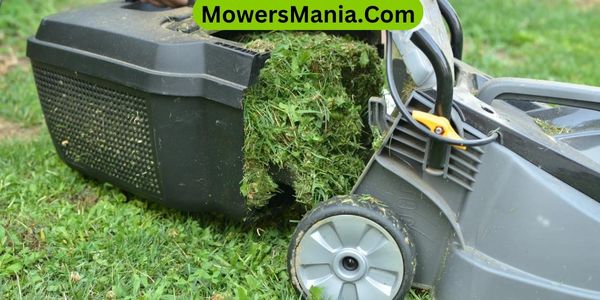
When it comes to removing debris and clippings from your mower grass catcher, it’s important to clear out any built-up grass and debris.
Using effective cleaning techniques will ensure that your grass catcher is functioning at its best.
Regularly removing debris and clippings will help maintain the performance and longevity of your mower grass catcher.
Clearing Grass and Debris
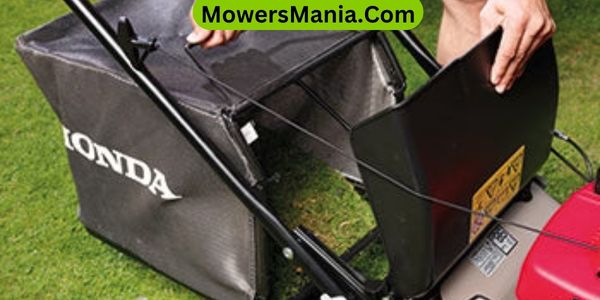
To clean the mower grass catcher effectively, carefully remove the grass and debris from the catcher after each use.
Begin by wearing gloves to protect your hands from any sharp debris.
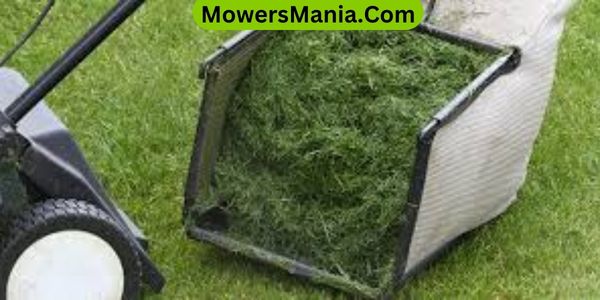
Empty the contents of the grass catcher into a trash bag or compost bin.
Use a handheld brush or broom to sweep out any remaining grass or debris stuck to the inside of the catcher.
For stubborn debris, use a garden hose to rinse out the catcher, ensuring all clippings and dirt are washed away.
Once the catcher is clean, allow it to air dry completely before storing it.
Regularly clearing grass and debris from the catcher not only maintains its efficiency but also prevents the spread of lawn diseases and pests.
Effective Cleaning Techniques
After carefully removing the grass and debris from the catcher, you can effectively clean it by utilizing specific techniques to ensure thorough removal of clippings and debris.
Start by using a brush or handheld vacuum to loosen and remove any remaining clippings stuck to the catcher’s mesh.
Then, rinse the catcher with a hose, directing the water from the inside out to dislodge any stubborn debris.
For more stubborn clippings, a gentle scrub with a mild detergent can help.
After cleaning, allow the catcher to air dry completely before reattaching it to the mower.
Regular maintenance is key to keeping your grass catcher clean and functional, so consider incorporating this cleaning routine into your regular lawn care schedule.
Washing and Drying the Catcher
When washing your mower grass catcher, make sure to properly drain any excess water after cleaning to prevent moisture buildup.
Air-drying the catcher thoroughly is important to ensure that it’s completely dry before use. This will help prevent the growth of mold and eliminate any potential odor.
Proper Drainage After Washing
Ensure proper drainage by tipping the grass catcher to allow excess water to flow out. After washing the grass catcher, it’s crucial to let it dry thoroughly to prevent mold and mildew growth.
To facilitate the drying process, follow these steps:
| Step | Action | Time Required |
|---|---|---|
| 1 | Shake the catcher to remove excess water | 1 minute |
| 2 | Place the catcher in a sunny, well-ventilated area | 1-2 hours |
| 3 | Periodically shake or flip the catcher to ensure even drying | As needed |
Air-Drying for Best Results
To expedite the drying process after washing the grass catcher, place it in a sunny, well-ventilated area to air-dry thoroughly.
Here are some tips to ensure the best results:
- Shake off excess water from the grass catcher before air-drying to speed up the process.
- Open up any flaps or compartments to allow air to circulate inside the catcher, aiding in complete drying.
- Periodically reposition the catcher while drying to ensure that all areas are exposed to sunlight and air.
- Once dried, reassemble the grass catcher and attach it securely to the mower for immediate use.
Following these steps will help you achieve a thoroughly dried and clean grass catcher, ready for the next mowing session.
Prevent Mold and Odor
Regular cleaning and thorough drying of the grass catcher is essential to prevent mold and odor buildup.
After washing the grass catcher with soap and water, ensure it’s completely dry before reattaching it to the mower.
To dry it effectively, shake off any excess water and then leave the catcher in a well-ventilated area. If possible, place it in direct sunlight to aid the drying process and inhibit mold growth.
Check for any lingering moisture in seams or crevices, as these areas are prone to mold development. Additionally, consider using a fan to expedite the drying process.
Inspecting for Wear and Tear
Check for any signs of wear and tear on the grass catcher to ensure optimal performance. Regularly inspecting your grass catcher can help you catch potential issues early and extend its lifespan.
Here are a few things to look out for:
- Tears or Holes: Examine the fabric or material of the grass catcher for any tears or holes. Even small tears can lead to grass clippings escaping and reduce the catcher’s effectiveness.
- Loose or Damaged Seams: Inspect the seams for any signs of unraveling or damage. Weak seams can result in the grass catcher failing to hold the clippings securely.
- Broken or Bent Frame Parts: Check the frame of the grass catcher for any broken or bent parts. A damaged frame can impact the stability and overall functionality of the catcher.
- Worn-out Fasteners: Look at the fasteners, such as zippers, buckles, or straps, and ensure they’re in good condition. Worn-out fasteners can lead to difficulties in securing the grass catcher to the mower.
Applying Lubrication if Necessary
After inspecting for wear and tear, you may need to apply lubrication to ensure smooth operation of the grass catcher.
Lubrication is crucial for maintaining the moving parts of the grass catcher, such as hinges and latches. Start by using a silicone-based lubricant as it’s resistant to water and won’t attract dirt and debris.
Apply the lubricant to all moving parts, including the hinges where the grass catcher connects to the mower. Be sure to wipe off any excess lubricant to prevent attracting grass clippings and other debris.
Additionally, check the wheels of the grass catcher and apply lubricant to the axles if they appear to be sticking or squeaking. Regularly applying lubrication won’t only ensure the smooth operation of the grass catcher but also extend its lifespan.
Remember to refer to the manufacturer’s guidelines for specific lubrication recommendations, as certain types of lubricants may be recommended for different mower models. Following these steps will help keep your grass catcher in optimal working condition.
Storing the Grass Catcher Properly
To keep the grass catcher in optimal condition, store it in a clean, dry place away from direct sunlight and moisture. Proper storage helps maintain the integrity of the grass catcher and ensures its longevity.
Here are some tips for storing your grass catcher effectively:
- Clean Before Storing: Before putting the grass catcher away, make sure to clean it thoroughly to remove any remaining grass clippings or debris. This prevents mold and mildew from forming during storage.
- Secure Lid or Cover: If your grass catcher has a lid or cover, be sure to secure it tightly before storing. This helps keep out dust, insects, and other potential contaminants.
- Elevate Off the Ground: Store the grass catcher off the ground, ideally on a shelf or hooks, to prevent moisture from seeping in and causing damage.
- Regular Inspection: Periodically check the stored grass catcher for any signs of damage or deterioration. This allows you to address any issues promptly and prevents them from worsening.
Frequently Asked Questions [FAQs]
Can I Use Any Type of Detergent or Cleaning Solution to Wash the Grass Catcher, or Are There Specific Products I Should Use?
You should use a gentle detergent or cleaning solution to wash the grass catcher. Avoid using harsh chemicals that could damage the material. Rinse thoroughly with water and allow it to dry completely before reattaching it to the mower.
Is It Necessary to Clean the Grass Catcher After Every Use, or Is There a Recommended Frequency for Cleaning?
You should clean the grass catcher after every use to avoid clogs and maintain optimal performance. Regular cleaning also prevents grass buildup and ensures a more efficient mowing process. It’s essential for the longevity of your mower.
Are There Any Specific Parts of the Grass Catcher That I Should Pay Extra Attention to When Inspecting for Wear and Tear?
When inspecting for wear and tear on the grass catcher, pay extra attention to the mesh or fabric for any tears or holes. Check the frame for any signs of rust or damage, and ensure that the latch mechanism is still functioning properly.
What Type of Lubrication Should I Use for the Grass Catcher, and How Often Should It Be Applied?
For the grass catcher, use a silicone lubricant. Apply it every few uses or whenever you notice the parts sticking. This will help keep the moving parts working smoothly and prevent rust or corrosion.
Are There Any Special Considerations for Storing the Grass Catcher if I Don’t Have a Dedicated Storage Area?
When storing the grass catcher without a dedicated area, cover it with a tarp or place it in a storage box to protect it from the elements. Ensure it’s clean and dry before storing to prevent rust and mold.
Conclusion
Now that you know how to clean your mower grass catcher effectively, you can ensure that it functions properly and lasts longer.
Regular cleaning, removing debris, washing and drying, inspecting for wear and tear, applying lubrication if necessary, and proper storage are all important steps in maintaining your grass catcher.
By following these simple steps, you can keep your mower grass catcher in top condition and enjoy a well-maintained lawn.

