
If you’ve ever found yourself stranded with a flat tire on your John Deere riding mower, don’t worry – it’s a problem you can easily fix. With just a few tools and a little know-how, you’ll be back to mowing in no time.
Follow these simple steps to get your mower back up and running.
Tools and Materials Needed
You will need a few basic tools and materials to fix a flat tire on your John Deere riding mower.
First, you’ll need a jack to lift the mower off the ground. A simple scissor jack should do the trick.
Additionally, having a lug wrench will make it easier to remove the wheel from the mower.
You’ll also need a tire repair kit, which typically includes patches, rubber cement, and a tire plug tool.
A pair of pliers will be useful for pulling out any nails or other objects stuck in the tire.
To inflate the tire, a portable air compressor or a hand pump is essential.
Lastly, having some soapy water on hand can help you locate the leak by creating bubbles at the puncture site.
With these tools and materials, you’ll be well-equipped to tackle the task of fixing a flat tire on your John Deere riding mower.
Identifying the Flat Tire
First, you’ll need to locate the puncture or any visible damage on the tire. Inspect the entire surface of the tire carefully, looking for any objects embedded in the tread or sidewall.
Then, check the tire pressure using a pressure gauge to determine if the tire has indeed gone flat.
Locate Puncture or Damage
To identify a flat tire on your John Deere riding mower, carefully inspect the surface of the tire for any visible punctures or damage.
Start by following these steps:
- Visual Inspection: Examine the tire closely for any signs of punctures, such as nails, screws, or sharp objects embedded in the rubber.
- Check for Cuts or Tears: Look for any cuts or tears on the tire’s surface, as these can also cause a flat tire.
- Inspect the Valve Stem: Ensure the valve stem is intact and not damaged, as this could also be the source of a slow leak.
Check Tire Pressure
Inspecting the tire pressure will help you identify the specific flat tire on your John Deere riding mower, facilitating the repair process.
Start by using a tire pressure gauge to check the air pressure in each tire. A significantly lower reading than the recommended psi (pounds per square inch) indicates the flat tire.
Visually inspect the identified tire for any punctures, cuts, or bulges. Sometimes, a puncture may not be immediately visible, so it’s essential to run your hand gently over the tire to feel for any sharp objects embedded in the rubber. Once you’ve located the flat tire, mark it for easy reference during the repair process.
Taking the time to check tire pressure thoroughly will ensure that you accurately pinpoint the flat tire and proceed with the necessary repairs.
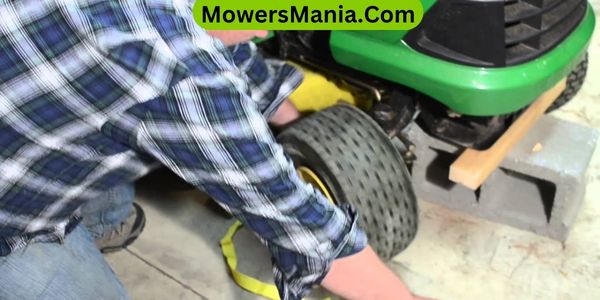
Removing the Wheel
First, you’ll need to gather the necessary tools for removing the wheel, such as a lug wrench and jack.
Once you have the tools ready, you can proceed with the wheel removal steps, including loosening the lug nuts and lifting the mower with the jack.
Remember to always prioritize safety when working on your mower.
Wheel Removal Steps
First, you need to use a wrench to loosen the lug nuts on the wheel that needs to be removed.
Once the lug nuts are loosened, follow these steps to remove the wheel:
- Lift the mower: Use a jack to lift the mower off the ground, ensuring that it’s stable and secure.
- Remove the lug nuts: Completely unscrew the lug nuts and set them aside in a safe place.
- Slide off the wheel: Carefully slide the wheel off the axle, making sure to support the weight of the wheel as you remove it.
Remember to exercise caution and work slowly to avoid any accidents or damage to the mower or yourself.
With the wheel removed, you can now proceed with fixing the flat tire.
Tools Needed for Removal
To remove the wheel from your John Deere riding mower, you’ll need a wrench to loosen the lug nuts. A lug wrench or a socket wrench with the correct size socket is essential for this task.
Additionally, having a jack to lift the mower is crucial for wheel removal. A hydraulic floor jack or a bottle jack can provide the necessary lift to elevate the mower for wheel access. It’s important to ensure that the jack is placed securely under the mower frame to prevent accidents.
Lastly, a pair of gloves is recommended to protect your hands while handling the wheel and tire.
With these tools on hand, you’ll be well-prepared to safely and effectively remove the wheel from your John Deere riding mower.
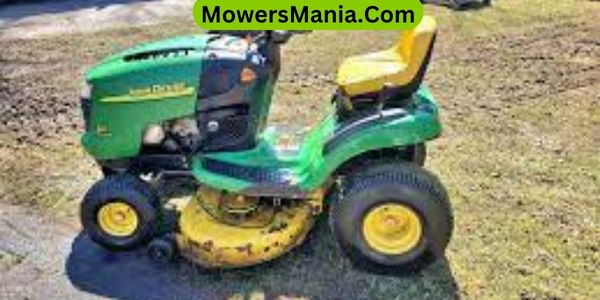
Repairing or Replacing the Tire
You can easily remove the flat tire from your John Deere riding mower by lifting the mower with a jack and unscrewing the lug nuts with a wrench. Once the tire is off, you’ll need to assess whether it can be repaired or if it needs to be replaced.
- Inspect the tire for punctures or leaks by submerging it in water and looking for air bubbles.
- If the puncture is small, you may be able to use a tire repair kit to seal it.
- Follow the instructions on the repair kit to ensure the tire is properly sealed and safe to use.
- If the tire has extensive damage or can’t be repaired, you’ll need to purchase a new tire that matches the specifications of your John Deere riding mower.
- Carefully mount the new tire onto the rim, ensuring it’s properly aligned.
- Secure the tire by tightening the lug nuts in a crisscross pattern to ensure even pressure.
Remember to check the tire pressure before using the mower again to ensure optimal performance and safety.
Reinstalling the Wheel
Once the tire is repaired or replaced, carefully reinstall the wheel onto the axle, ensuring it is securely fastened with the lug nuts.
Here’s a step-by-step guide to help you with the process:
| Step | Instructions |
|---|---|
| Step 1 | Position the wheel onto the axle, making sure it aligns properly. |
| Step 2 | Slide the wheel onto the axle until it sits flush against the hub. |
| Step 3 | Thread the lug nuts onto the studs and tighten them by hand to ensure they are properly seated. |
| Step 4 | Use a torque wrench to tighten the lug nuts in a star pattern to the manufacturer’s specifications. This helps distribute the pressure evenly. |
| Step 5 | Double-check the lug nuts to ensure they are securely fastened. |
| Step 6 | Lower the mower back to the ground and give the wheel a gentle spin to ensure it rotates smoothly. |
Following these steps will ensure that the wheel is reinstalled correctly and securely. Always refer to your mower’s manual for specific instructions and torque specifications.
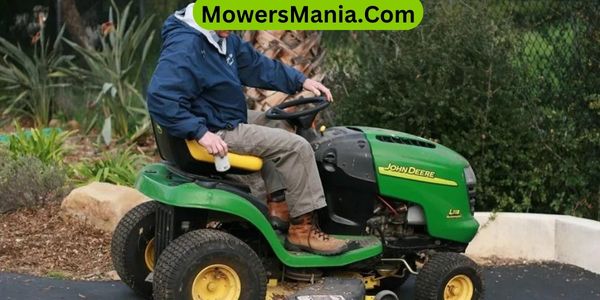
Testing the Tire and Wheel
After reinstalling the wheel, spin it gently to ensure smooth rotation before resuming normal operation of the mower.
Testing the tire and wheel is crucial to guarantee safety and effectiveness. Here’s what to do:
- Check for Wobbling: Lift the mower off the ground and spin the wheel. If it wobbles, it may not be installed correctly, or the wheel bearings could be damaged. Address any wobbling before use.
- Inspect the Tire Pressure: Use a pressure gauge to check the air pressure in the tire. Compare it to the manufacturer’s recommended psi. Adjust the pressure as needed to ensure optimal performance.
- Look for Leaks: Spray a mixture of soap and water onto the tire and around the valve stem. Bubbles will form at the site of a leak. If there’s a leak, you’ll need to repair or replace the tire.
Frequently Asked Questions [FAQs]
Can I Use a Regular Car Tire Repair Kit on a John Deere Riding Mower Tire?
Yes, you can use a regular car tire repair kit on a John Deere riding mower tire. It’s important to follow the instructions carefully and ensure that the kit is compatible with the type of tire on your mower.
Is It Necessary to Remove the Tire From the Wheel to Repair a Flat Tire?
Yes, it’s necessary to remove the tire from the wheel to repair a flat tire on a John Deere riding mower. This allows for a thorough inspection and effective patching of the tire.
How Often Should I Check the Tire Pressure on My John Deere Riding Mower?
You should check the tire pressure on your John Deere riding mower at least once a month. Proper tire pressure ensures better performance and extends tire life. Use a pressure gauge to measure and adjust as needed.
Can I Use an Aerosol Tire Sealant to Fix a Flat Tire on My Riding Mower?
Yes, you can use an aerosol tire sealant to fix a flat tire on your riding mower. It’s a quick and convenient solution for small punctures. Just follow the instructions on the can for best results.
What Are the Most Common Causes of Flat Tires on a John Deere Riding Mower?
Flat tires on a John Deere riding mower are commonly caused by punctures from sharp objects, worn-out tires, or improper tire pressure. Checking for these issues regularly can help prevent unexpected flat tires.
Conclusion
Now that you’ve fixed the flat tire on your John Deere riding mower, you can get back to mowing your lawn with ease.
Remember to regularly check your tires for any signs of wear and tear to prevent future flats.
Taking care of your equipment will ensure it lasts for years to come.
Happy mowing!

