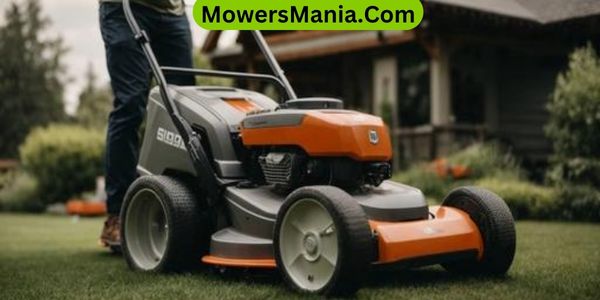
Are you having trouble with your Husqvarna self-propelled lawn mower? Don’t worry, we’ve got you covered!
In this article, we’ll show you how to adjust your mower for optimal performance. From checking the drive belt tension to troubleshooting common issues, we’ll walk you through the steps to ensure your mower is in top shape.

So grab your tools and let’s get started on maximizing your lawn mowing experience!
Checking the Drive Belt Tension
To check the drive belt tension on your Husqvarna self-propelled lawn mower, start by using a ruler or tape measure. First, make sure the engine is off and the spark plug wire is disconnected to prevent any accidental starts.
Locate the drive belt cover, which is usually on the side or the front of the mower. Remove the cover by unscrewing the screws or releasing the clips.
Once the cover is off, you’ll see the drive belt. Take your ruler or tape measure and place it between the belt and the pulleys. Gently press down on the belt with your ruler or tape measure and measure the distance between the belt and the pulleys.
The tension should be around 1/4 to 1/2 inch. If the tension is too loose or too tight, adjustments are needed.
To adjust the tension, locate the belt tensioner. This is usually a small lever or knob that can be turned to increase or decrease the tension. Turn the tensioner clockwise to increase the tension and counterclockwise to decrease it. Make small adjustments and recheck the tension until it falls within the recommended range.
Once you have achieved the proper tension, replace the drive belt cover and secure it in place. Reconnect the spark plug wire and start the engine to ensure everything is working correctly.
Regularly checking and adjusting the drive belt tension will help maintain optimal performance and prolong the life of your Husqvarna self-propelled lawn mower.
Adjusting the Self-Propel Speed Control
To adjust the self-propel speed control on your Husqvarna self-propelled lawn mower, start by locating the speed control lever or knob on the handle. This lever or knob is typically marked with different speed settings, ranging from slow to fast.
Once you have located it, follow the steps below to adjust the self-propel speed:
| Speed Setting | Action |
|---|---|
| Slow | The mower moves at a slower pace, ideal for delicate areas or when you want to take your time. |
| Medium | This is a moderate speed for general mowing tasks on flat terrain. |
| Fast | The mower moves at a faster pace, suitable for larger areas or when you want to finish mowing quickly. |
Setting the Cutting Height
Adjusting the cutting height of your Husqvarna self-propelled lawn mower allows you to customize the length of your grass for optimal mowing results.
To begin, locate the cutting height adjustment lever on your mower. This lever is usually located near the wheels or the front of the mower deck.
Once you have found it, simply move the lever up or down to adjust the cutting height. It’s important to note that different models may have different cutting height ranges, so refer to your owner’s manual for specific instructions.
When setting the cutting height, consider the condition of your lawn and the season. For example, during the summer months, it’s generally recommended to set the cutting height higher to help the grass retain moisture and withstand heat stress.
On the other hand, in the cooler months, you may want to lower the cutting height to help prevent the growth of weeds and promote a neat appearance.
After adjusting the cutting height, it’s a good idea to test it out on a small section of your lawn before mowing the entire area.
This allows you to ensure that the height is set to your desired preference. Remember to adjust the cutting height as needed throughout the mowing season to maintain the health and appearance of your lawn.
Aligning the Wheels for Proper Maneuverability

To ensure optimal maneuverability with your Husqvarna self-propelled lawn mower, it’s crucial to align the wheels properly.
Wheel alignment plays a vital role in how smoothly your mower moves, making it easier to navigate around obstacles and maintain a straight cutting path.
Wheel Alignment Importance
Ensure proper maneuverability of your Husqvarna self-propelled lawn mower by aligning its wheels correctly. Wheel alignment is crucial for optimal performance and ease of use.
Here are five reasons why wheel alignment is important:
- Improved maneuverability: Properly aligned wheels allow for smooth and effortless maneuvering, making it easier to navigate around obstacles in your lawn.
- Even cutting: Wheel alignment ensures that all four wheels are in line, resulting in an even and precise cutting pattern. This helps achieve a well-manicured lawn.
- Reduced strain on the engine: Misaligned wheels can cause uneven weight distribution, leading to unnecessary strain on the engine. Aligning the wheels helps maintain the mower’s efficiency and prolong its lifespan.
- Prevents scalping: Wheel alignment prevents the mower from scalping the grass by ensuring an even cutting height across the entire cutting deck.
- Enhanced traction: Proper alignment ensures that all wheels make optimal contact with the ground, improving traction and preventing slippage on uneven terrain.
Correcting Poor Maneuverability
To improve the maneuverability of your Husqvarna self-propelled lawn mower, start by properly aligning its wheels.
When the wheels are not aligned correctly, it can cause the mower to veer to one side or make it difficult to navigate around obstacles in your yard.
Here’s a simple guide to help you align the wheels for optimal maneuverability:
| Step | Action | Result |
|---|---|---|
| 1 | Park the mower on a level surface. | Ensures accurate alignment. |
| 2 | Loosen the wheel adjustment knob or nut. | Allows for adjustment of wheel position. |
| 3 | Align the wheels parallel to each other. | Provides stability and straight-line mowing. |
| 4 | Tighten the adjustment knob or nut. | Secures the wheel alignment. |
DIY Wheel Alignment
To align the wheels of your Husqvarna self-propelled lawn mower for proper maneuverability, follow these simple steps:
- Start by parking the mower on a flat surface.
- Locate the adjustment nuts on each wheel. These are usually located near the center of the wheel.
- Loosen the nuts using a wrench or pliers.
- Align the wheels by adjusting them to the desired position. Make sure they’re straight and parallel to each other.
- Once aligned, tighten the adjustment nuts securely.
Proper wheel alignment is crucial for ensuring smooth and precise maneuverability of your lawn mower. By following these steps, you can easily align the wheels yourself and improve the overall performance of your Husqvarna self-propelled lawn mower.
Remember to check the wheel alignment periodically to maintain optimal maneuverability.
Adjusting the Handle Height for Comfortable Operation
To achieve a comfortable operation, adjust the handle height of your Husqvarna self propelled lawn mower using a set of tools and a few simple steps.
Start by locating the adjustment knobs on both sides of the handle. These knobs allow you to raise or lower the handle to your desired height.
Using a wrench or pliers, loosen the knobs by turning them counterclockwise. Once the knobs are loose, you can adjust the handle height by sliding it up or down. Make sure to align the holes on the handle with the corresponding holes on the mower’s frame.
Once you have found the desired height, tighten the knobs by turning them clockwise. Ensure that the knobs are securely tightened to prevent any movement during operation.
It’s important to adjust the handle height to a position that feels comfortable for you. This will help reduce strain on your back and arms, allowing for a more enjoyable mowing experience.
Remember to always follow the manufacturer’s instructions for proper handle height adjustment.
Inspecting and Cleaning the Air Filter
You can inspect and clean the air filter of your Husqvarna self propelled lawn mower to ensure optimal performance. Regular maintenance of the air filter is important to prevent dirt and debris from clogging the engine and reducing its efficiency.
Here are some steps you can follow to inspect and clean the air filter:
- Step 1: Locate the air filter cover on your lawn mower. It’s usually located on the side or top of the engine.
- Step 2: Remove the air filter cover by unscrewing the screws or releasing the clips that hold it in place.
- Step 3: Take out the air filter from its housing. Inspect the filter for any signs of dirt, debris, or damage.
- Step 4: If the filter is dirty, use a soft brush or compressed air to gently remove the debris. Be careful not to damage the filter.
- Step 5: If the air filter is too dirty or damaged, it’s recommended to replace it with a new one. Make sure to use a genuine Husqvarna air filter for the best performance.
Regularly inspecting and cleaning the air filter will help your Husqvarna self propelled lawn mower run smoothly and efficiently. It’s a simple maintenance task that can greatly extend the life of your mower and ensure a clean cut every time.
Troubleshooting Common Issues and Solutions

Inspecting and cleaning the air filter is an important step in maintaining optimal performance for your Husqvarna self propelled lawn mower, but if you encounter any common issues, troubleshooting and finding solutions can help keep your mower running smoothly.
One common issue that you may face is a mower that doesn’t start. Before assuming the worst, check if the fuel tank is empty or if the spark plug is dirty or faulty.
If the tank is empty, fill it up with fresh fuel. If the spark plug is dirty, remove it and clean it with a wire brush. If it’s faulty, replace it with a new one.
Another issue you might encounter is poor cutting performance. This can be caused by a dull blade or a clogged cutting deck.
To resolve this, sharpen the blade using a file or replace it if necessary. Additionally, clean the cutting deck thoroughly, removing any grass clippings or debris that may be obstructing the blades.
If your mower isn’t self-propelling properly, check the drive belt. Over time, the belt can become worn or loose, affecting the self-propel function. Replace the belt if it’s worn or adjust it if it’s loose.
Frequently Asked Questions [FAQs]
How Do I Start the Husqvarna Self-Propelled Lawn Mower?
To start the Husqvarna self-propelled lawn mower, simply grip the handle and squeeze the control bar against the handle. While holding the bar, pull the starter cord briskly. The mower should then start up and be ready for use.
How Often Should I Change the Oil in My Husqvarna Self-Propelled Lawn Mower?
You should change the oil in your Husqvarna self-propelled lawn mower regularly to keep it running smoothly. Follow the manufacturer’s recommendations for the specific model to ensure optimal performance and longevity of the machine.
Can I Use Regular Gasoline in My Husqvarna Self-Propelled Lawn Mower?
You can use regular gasoline in your Husqvarna self-propelled lawn mower. Just make sure to follow the manufacturer’s recommendations for the correct fuel type and octane rating.
What Should I Do if My Husqvarna Self-Propelled Lawn Mower Is Not Cutting Grass Evenly?
If your Husqvarna self-propelled lawn mower is not cutting grass evenly, there are a few steps you can take. First, check the blade to ensure it’s sharp and balanced. Then, adjust the cutting height to the desired level.
How Do I Store My Husqvarna Self-Propelled Lawn Mower During the Winter Months?
To store your Husqvarna self-propelled lawn mower during winter, first clean the mower thoroughly. Then, remove the spark plug and drain the fuel. Store the mower in a dry and secure place to protect it from the elements.
Conclusion
In conclusion, by following these simple steps to adjust your Husqvarna self-propelled lawn mower, you can ensure optimal performance and comfortable operation.
From checking the drive belt tension to troubleshooting common issues, it’s important to regularly maintain and adjust your mower for the best results.
With a properly adjusted mower, you can achieve a well-manicured lawn with ease.


