If you’re having trouble starting your mower or notice a decrease in performance, it may be time to change your fuel filter.
In this article, you’ll learn the importance of fuel filter maintenance and how to easily replace it.

With just a few simple tools and steps, you’ll have your mower running smoothly in no time.
Importance of Fuel Filter Maintenance
You should regularly inspect and replace the fuel filter in your mower every 100 hours of operation to ensure optimal performance and prevent potential engine issues.
The fuel filter plays a crucial role in keeping your mower’s engine running smoothly by filtering out dirt, debris, and other impurities from the fuel before it reaches the engine.
Over time, the fuel filter can become clogged and dirty, restricting the flow of fuel to the engine and causing a decrease in performance.
By maintaining a clean fuel filter, you can ensure that your mower’s engine receives a consistent and clean fuel supply, leading to improved efficiency and longevity.
Neglecting the maintenance of the fuel filter can result in various issues such as engine stalling, rough idling, difficulty starting the mower, and overall reduced performance.
These problems can be costly to repair and may lead to permanent damage to the engine if left unaddressed.
Tools and Materials Needed
You’ll need a few basic tools and materials for this job, as well as some safety precautions and equipment.
Let’s go over the required items and steps to ensure you have everything ready before you start.
Following these guidelines will help make the fuel filter change go smoothly and safely.
Required Tools and Parts
To successfully change your mower’s fuel filter, you’ll frequently need a few specific tools and materials.
Here are the items you’ll need:
- Socket Wrench Set: This will help you remove the fuel filter housing and replace the filter itself.
- Safety Glasses: Protect your eyes from any potential fuel splashes or debris while working on the mower.
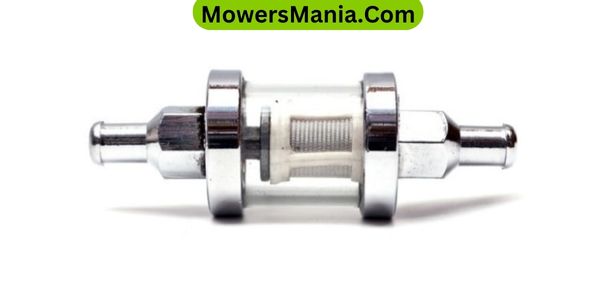
- New Fuel Filter: Ensure you have the correct replacement fuel filter for your specific mower model. This is the most crucial part as it’s the item you’ll be replacing.
Gathering these tools and materials beforehand will make the fuel filter replacement process smoother and more efficient.
Safety Precautions and Equipment
Before beginning the fuel filter replacement, make sure your safety glasses are on to protect your eyes from potential fuel splashes or debris while working on the mower. It’s crucial to ensure your safety before starting.
Additionally, wear gloves to shield your hands from any fuel or dirt. Make sure the mower is turned off and the engine is cool to avoid any burns.
You’ll need a pair of pliers to disconnect the fuel lines, and a container to catch any fuel that may spill out. A new fuel filter specific to your mower model is essential for the replacement.
A rag or paper towels will also come in handy for cleaning up any spills or mess. Lastly, keep a fire extinguisher nearby, as a safety precaution in case of any unexpected fuel-related incidents.
Locating the Fuel Filter

When locating the fuel filter on your mower, you’ll typically find it underneath the mower near the tank.
If you’re unsure of its exact location, consult your owner’s manual for specific guidance.
Remember to wear protective gloves when handling the fuel filter to avoid any potential contact with harmful substances.
Underneath Mower Near Tank
You can find the mower’s fuel filter underneath the mower near the tank.
To locate the fuel filter, follow these steps:
- Check Near the Fuel Tank: Look for the fuel filter along the fuel line that runs from the fuel tank to the engine. The filter is usually situated somewhere along this line, often closer to the fuel tank.
- Inspect the Undercarriage: If you can’t spot the filter near the fuel tank, check the undercarriage of the mower. The filter may be tucked away beneath the mower, closer to the engine.
- Refer to the Owner’s Manual: If you’re having trouble locating the fuel filter, consult the owner’s manual for your specific mower model. The manual should provide detailed instructions on the filter’s location.
Check Owner’s Manual
To locate the fuel filter, start by consulting the owner’s manual for your specific mower model. The location of the fuel filter can vary between different mower models, and the owner’s manual will provide you with the exact information you need.
Look for a section in the manual that details the maintenance of the fuel system or specifically mentions the fuel filter.
In most cases, the manual will include a diagram or description of where the fuel filter is located on your mower. If you don’t have the manual on hand, you can often find it online by searching for the make and model of your mower.
Once you have located the fuel filter in the manual, you can proceed with the necessary steps to access and replace it.
Wear Protective Gloves
After locating the fuel filter as specified in the owner’s manual, put on protective gloves before proceeding to access and replace it. This will help protect your hands from any fuel or debris that may be present during the replacement process.
Here’s what to do next:
- Put on a pair of durable, protective gloves to shield your hands from potential fuel spills and sharp edges.
- Ensure that the gloves fit well and allow for dexterity to manipulate the tools and components safely.
- Inspect the gloves for any tears or damage before use, and replace them if necessary to maintain their protective integrity.
Draining the Fuel System
Once the fuel tank is empty, disconnect the fuel line from the filter to begin draining the fuel system. Locate the fuel line that runs from the fuel filter to the engine.
Using a pair of pliers, gently loosen the hose clamps that secure the fuel line to the filter. Be prepared for some residual fuel to drip out once the line is disconnected.
Next, carefully direct the end of the fuel line into a suitable container. This will prevent any spilled fuel from contaminating the ground. Once the fuel line is positioned, release the clamps fully and allow the fuel to drain completely from the line and filter.
Keep in mind that there may be a small amount of fuel left in the filter, so handle it with care to avoid any spills.
After the fuel has been drained, inspect the fuel line for any signs of damage or wear. If the line appears worn or cracked, it should be replaced to prevent any potential fuel leaks.
Once the draining process is complete and any necessary maintenance has been performed, you can proceed with installing the new fuel filter and reconnecting the fuel line.
Removing the Old Fuel Filter

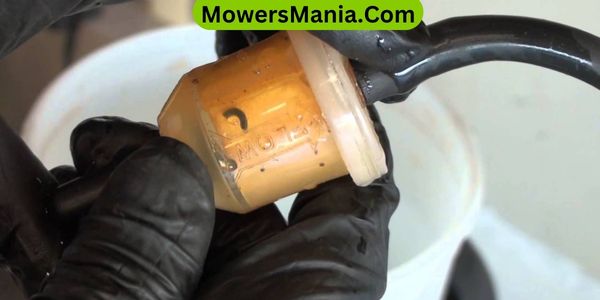
Disconnect the old fuel filter from the fuel line using a suitable wrench or pliers, ensuring that no residual fuel spills out during the process. Start by locating the fuel filter, which is typically located between the fuel tank and the carburetor.
Once located, follow these steps to remove the old fuel filter:
- Use a wrench or pliers to loosen the hose clamps that secure the fuel line to the fuel filter. Gently twist and pull the fuel line off the filter, being careful not to damage the line or the filter.
- Next, use the appropriate tool to loosen the mounting bracket or strap that holds the fuel filter in place. Once the bracket is loose, carefully remove the old fuel filter from its position.
- Take a moment to inspect the fuel filter and the surrounding area for any signs of damage or leaks. Clean the area if necessary, and dispose of the old fuel filter properly according to local regulations.
With the old fuel filter removed, you’re now ready to proceed with installing the new filter and reconnecting the fuel line.
Installing the New Fuel Filter
Where exactly does the new fuel filter need to be installed in relation to the fuel tank and carburetor?
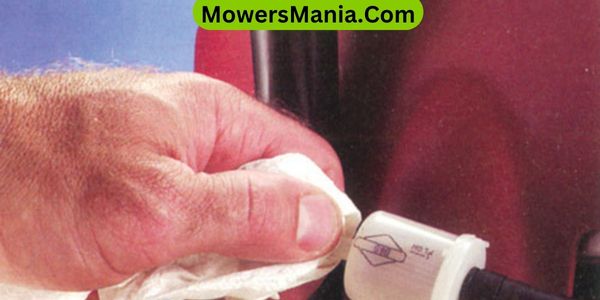
After removing the old fuel filter, take the new filter and connect it in-line between the fuel tank and the carburetor. The fuel filter should be installed in the direction indicated by the arrow on the filter, which shows the flow of fuel.
Typically, the arrow on the filter should point towards the carburetor. This ensures that the fuel flows in the correct direction, preventing any potential issues with fuel delivery to the engine.
Once you have determined the correct orientation, slide the fuel lines onto the filter’s inlet and outlet. Ensure that the fuel lines are securely attached and that there are no leaks.
Then, reattach any clips or clamps that hold the fuel lines in place to prevent them from coming loose during operation. After securing the fuel lines, double-check all connections to guarantee that everything is properly installed.
Once the new fuel filter is securely in place, you can move on to the next steps of reassembling any parts you removed before, such as the engine cover or housing.
With the new fuel filter installed, your mower’s fuel system will be ready to effectively filter out any debris and ensure a smooth flow of fuel to the engine.
Testing the Mower
After installing the new fuel filter, you should now test the mower to ensure that it runs smoothly and that there are no fuel leakage issues.
Here’s how to do it:
- Start the Engine: Crank up the mower and let it run for a few minutes. Listen for any irregular noises or sputtering, which could indicate a problem with the fuel flow.
- Check for Leaks: While the mower is running, inspect the area around the fuel filter and the fuel lines for any signs of leakage. Even a small drip could lead to bigger issues down the road.
- Test at Different Speeds: Take the mower for a spin at various speeds, including both slow and high settings. This will help ensure that the fuel filter is effectively supplying a steady flow of fuel to the engine regardless of the operating conditions.
Frequently Asked Questions (FAQs)
Can I Clean and Reuse My Old Fuel Filter Instead of Replacing It?
You should always replace your mower’s fuel filter instead of trying to clean and reuse it. Reusing a clogged filter can lead to engine problems and poor performance. It’s best to install a new one.
How Often Should I Change My Mower’s Fuel Filter?
You should change your mower’s fuel filter every 100 hours of use or at least once a year. This helps maintain proper fuel flow and prevents clogs that can hinder your mower’s performance.
What Are the Signs That My Fuel Filter Needs to Be Replaced?
If you notice your mower struggling, surging, or stalling, it may be time to replace the fuel filter. Reduced engine power and difficulty starting are also signs. It’s important to address these issues promptly.
Can I Use a Different Type of Fuel Filter in My Mower Than the One That Came With It?
Yes, you can use a different type of fuel filter in your mower than the one that came with it. Just ensure that the new filter is compatible with your mower’s engine for optimal performance.
Should I Also Replace the Fuel Lines When Changing the Fuel Filter?
When changing the fuel filter on your mower, you should also replace the fuel lines if they are old or damaged. This ensures proper fuel flow and prevents potential issues down the line.
Conclusion
Now that you’ve installed your new fuel filter, start up your mower and make sure it runs smoothly.
Regular maintenance of your fuel filter will keep your mower running efficiently and extend its lifespan.
Don’t forget to check it periodically and replace it as needed to keep your mower in top condition.
Happy mowing!


