
Are you struggling to charge your Toro lawn mower battery? Don’t worry, we’ve got you covered!
In this article, we’ll show you the step-by-step process of how to charge your Toro lawn mower battery effectively. From checking the battery’s voltage to monitoring the charging process, we’ll guide you through every step.
So grab your charging equipment and let’s get started!
Check the Battery’s Voltage
To check the battery’s voltage, start by connecting a volt meter to the battery using the positive and negative terminals. This step is crucial in determining the current state of your Toro lawn mower battery.
Begin by locating the positive terminal, which is usually marked with a ‘+’ symbol, and the negative terminal, marked with a ‘-‘ symbol. Take the red lead from the volt meter and attach it to the positive terminal of the battery. Then, take the black lead and connect it to the negative terminal.
Once the connections are secure, turn on the volt meter and set it to the DC voltage setting. The meter will display the voltage reading of your battery.
If the reading is below the recommended voltage, it may be an indication that your battery needs to be charged or replaced. On the other hand, if the reading falls within the acceptable range, your battery is likely in good condition.
Remember to always wear protective gloves and goggles when working with batteries to ensure your safety.
Prepare the Charging Equipment
Now that you have checked the battery’s voltage, it is time to prepare the charging equipment. Before you begin, make sure you have the necessary tools and materials to safely charge your Toro lawn mower battery.
Here is a handy table outlining the items you will need:
| Equipment | Description |
|---|---|
| Battery charger | A charger specifically designed for lawn mower batteries |
| Power outlet | A nearby electrical outlet to plug in the charger |
| Safety goggles | Protective eyewear to shield your eyes from any sparks |
| Gloves | Insulated gloves to protect your hands from electrical shocks |
Having these items ready will ensure a smooth and safe charging process for your Toro lawn mower battery. Remember to wear your safety goggles and gloves throughout the charging process to minimize any potential risks.
Once you have gathered all the necessary equipment, you can proceed to the next step of connecting the charger to the battery.
Connect the Charger to the Battery

Before connecting the charger to the battery, ensure that the charger is unplugged from the power outlet. This step is crucial to prevent any accidental electrical shocks or damage to the charger or battery.
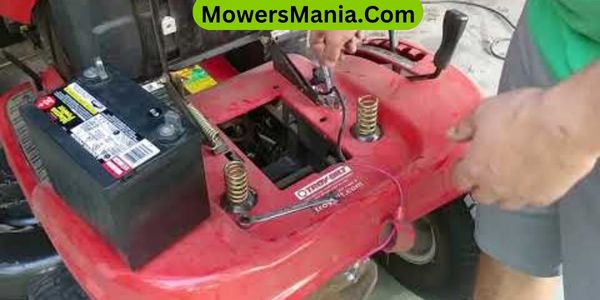
Once you have confirmed that the charger is unplugged, locate the positive and negative terminals on the battery. The positive terminal is usually marked with a plus sign (+), while the negative terminal is marked with a minus sign (-).
Take the charger’s positive cable and connect it to the positive terminal of the battery. Make sure the connection is secure and tight to ensure proper charging.
Next, take the charger’s negative cable and connect it to the negative terminal of the battery. Again, ensure that the connection is secure.
Once the charger is properly connected to the battery, you can plug the charger into a power outlet. The charger will now start charging the battery.
It’s important to follow the manufacturer’s instructions regarding the charging time. Once the battery is fully charged, you can disconnect the charger from the power outlet and remove the cables from the battery terminals.
Monitor the Charging Process
During the charging process, you can monitor the status of your Toro lawn mower battery. This allows you to ensure that the battery is charging properly and to track its progress.
Here are three ways you can monitor the charging process:
- Check the charge indicator: Many Toro lawn mower models come equipped with a charge indicator on the battery itself. This indicator shows the current level of charge in the battery, allowing you to easily monitor its progress. If the indicator shows a low charge or no charge at all, it may indicate a problem with the charger or the battery.
- Use a voltmeter: If your Toro lawn mower doesn’t have a built-in charge indicator, you can use a voltmeter to monitor the charging process. Simply connect the voltmeter to the battery terminals and check the voltage. As the battery charges, the voltage will gradually increase. Once it reaches the recommended voltage for a fully charged battery, you can safely disconnect the charger.
- Observe the charging time: Depending on the size and condition of your Toro lawn mower battery, the charging time can vary. Keep an eye on the estimated charging time provided by the manufacturer and compare it to the actual time it takes to charge the battery. If the actual charging time is significantly longer or shorter than the estimated time, it may indicate a problem with the battery or the charger.
Disconnect and Test the Battery

To disconnect and test the battery on your Toro lawn mower, follow these steps:
- Make sure the lawn mower is turned off and the key is removed.
- Locate the battery compartment, usually near the engine.
- Open the compartment by removing the cover or unscrewing any holding brackets.
- Disconnect the battery cables, starting with the negative cable. It is usually marked with a minus (-) sign or colored black.
- Use a wrench or pliers to loosen the nut on the terminal and gently pull the cable off. Be careful not to touch both terminals at the same time to avoid electrical shock.
- After disconnecting the negative cable, move on to the positive cable. It is typically marked with a plus (+) sign or colored red.
- Again, use a wrench or pliers to loosen the nut on the terminal and remove the cable.
- With the battery disconnected, it’s time to test its voltage.
- Use a voltmeter or multimeter to measure the voltage across the battery terminals.
- A fully charged battery should read around 12.6 volts. If the reading is significantly lower, it may be time to recharge or replace the battery.
Frequently Asked Questions [FAQs]
How Long Does It Typically Take to Fully Charge a Toro Lawn Mower Battery?
Typically, it takes a few hours to fully charge a Toro lawn mower battery. Make sure you connect the charger properly and let it charge undisturbed until it reaches full capacity.
Can I Use Any Type of Charger to Charge the Toro Lawn Mower Battery?
Yes, you can use any type of charger to charge the Toro lawn mower battery. Just make sure it has the appropriate voltage and amperage to prevent damage and ensure a proper charge.
Is It Safe to Leave the Battery Connected to the Charger Overnight?
It’s not recommended to leave the battery connected to the charger overnight. Doing so may lead to overcharging, which can damage the battery and reduce its lifespan. It’s best to disconnect the battery once it’s fully charged.
What Should I Do if the Battery Does Not Hold a Charge After Charging It?
If the battery doesn’t hold a charge after charging it, try checking the connections and cleaning any corrosion. If that doesn’t work, you may need to replace the battery.
Can I Use the Toro Lawn Mower While the Battery Is Charging?
Yes, you can use the Toro lawn mower while the battery is charging. It’s convenient because you don’t have to wait for the battery to be fully charged before mowing your lawn.
Conclusion
In conclusion, charging your Toro lawn mower battery is a simple process that requires the following steps:
- Checking the voltage
- Preparing the charging equipment
- Connecting the charger to the battery
- Monitoring the charging process
- Disconnecting and testing the battery
By following these steps, you can ensure that your lawn mower is powered up and ready for your next mowing session.

