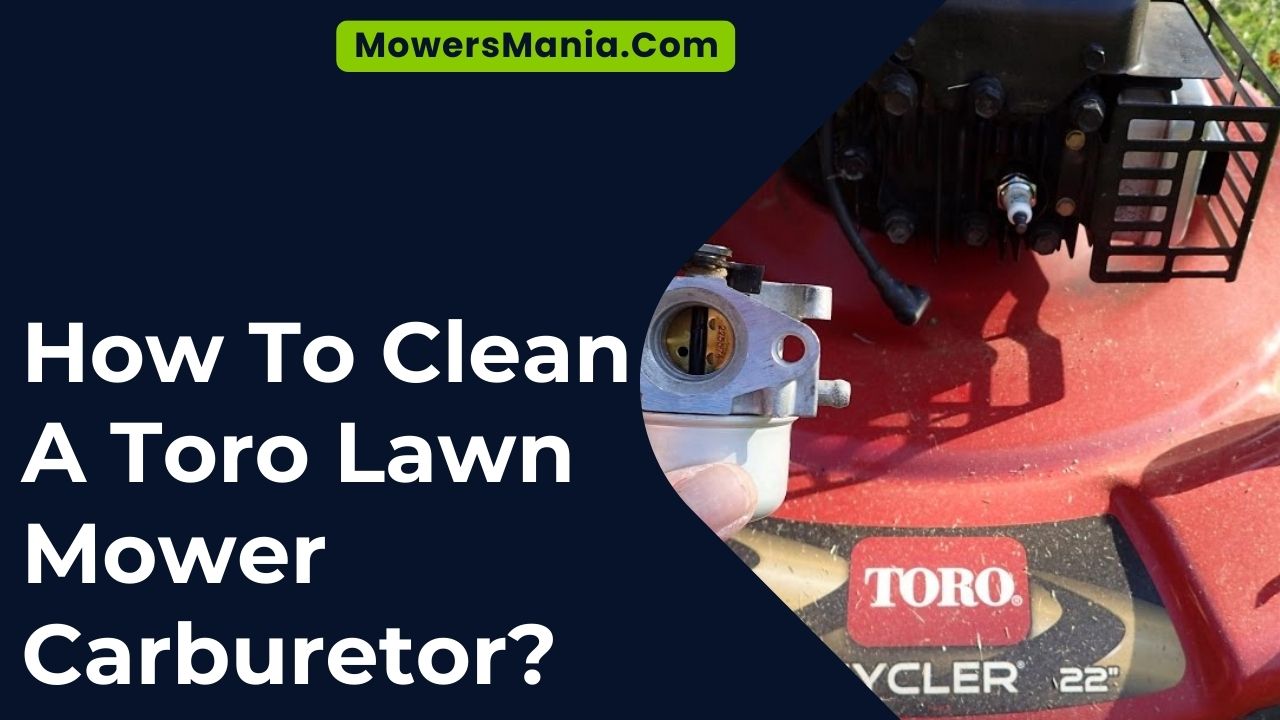
If your Toro lawn mower is not running smoothly or won’t start at all, it might be time to clean the carburetor. In this guide, we’ll show you how to easily tackle this task.
You’ll learn how to remove, disassemble, clean, and reassemble the carburetor. By the end, you’ll be equipped with the knowledge to get your Toro mower running like new again.
So let’s get started!
Required Tools
To clean a Toro lawn mower carburetor, you’ll need a few essential tools. These tools will help make the task easier and more efficient.
First, you’ll need a screwdriver, preferably a flathead or Phillips head, depending on the type of screws on your carburetor. This will allow you to remove the screws and access the carburetor for cleaning.
Additionally, a pair of pliers will be useful for disconnecting any fuel lines or removing stubborn parts.
Next, you’ll need a can of carburetor cleaner. This is an important tool for removing built-up grime and debris from the carburetor. Make sure to choose a cleaner that’s specifically designed for carburetors to ensure proper and safe cleaning.
Finally, a clean cloth or rag will be necessary for wiping and drying the carburetor components after cleaning. This will help remove any remaining residue and ensure the carburetor is clean and ready to be reassembled.
With these essential tools, you’ll be well-equipped to clean your Toro lawn mower carburetor effectively and efficiently.
Removing the Carburetor
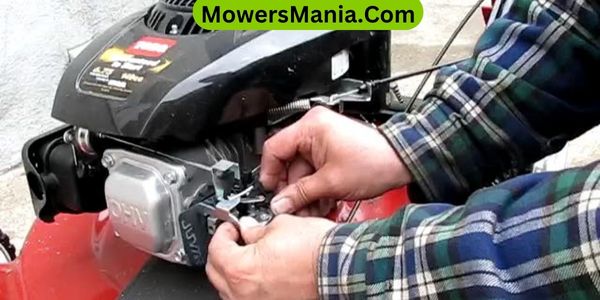
To remove the carburetor from your Toro lawn mower, use a pair of pliers to disconnect any fuel lines or remove any stubborn parts. The carburetor is an essential component of your lawn mower, responsible for mixing air and fuel to create the combustion needed to power the engine.
Over time, it can become clogged with debris, affecting the mower’s performance. Removing and cleaning the carburetor is a necessary maintenance task to ensure your Toro lawn mower runs smoothly.
To help you visualize the process, here is a table that outlines the steps involved in removing the carburetor:
| Steps to Remove the Carburetor | |
|---|---|
| Step 1 | Disconnect the spark plug wire to prevent accidental starts. |
| Step 2 | Locate the carburetor on your Toro lawn mower. |
| Step 3 | Use pliers to disconnect any fuel lines attached to the carburetor. |
| Step 4 | Remove any stubborn parts, such as screws or brackets, holding the carburetor in place. |
Disassembling the Carburetor
To disassemble the carburetor of your Toro lawn mower, start by removing the screws that secure the cover in place. Use a screwdriver to carefully unscrew each screw and set them aside in a safe place. Once the screws are removed, gently lift off the cover to expose the inner components of the carburetor.
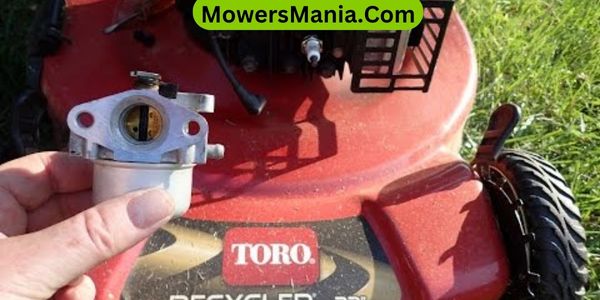
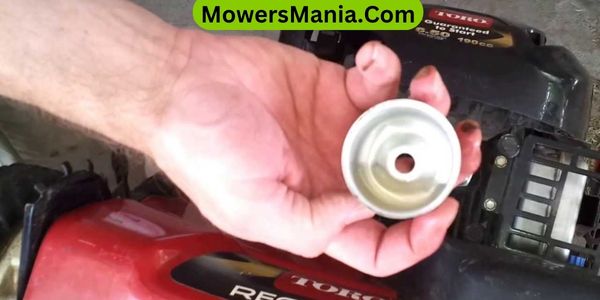
Next, locate the float bowl, which is a small bowl-shaped reservoir attached to the bottom of the carburetor. Using a wrench or pliers, loosen the nut that holds the float bowl in place. Be cautious as you remove the nut, as it may be tight and require some force. Once the nut is loosened, carefully detach the float bowl from the carburetor.
With the float bowl removed, you’ll now have access to the float and the needle valve. Take note of their position and orientation before removing them. Using a pair of needle nose pliers, gently remove the pin that holds the float in place. Once the pin is removed, carefully detach the float and needle valve from the carburetor.
Congratulations! You have successfully disassembled the carburetor of your Toro lawn mower. Now, you can proceed to clean each component thoroughly to ensure optimal performance.
Cleaning the Carburetor Components
Clean each component of the carburetor thoroughly to ensure optimal performance. Cleaning the carburetor components is an essential step in maintaining your Toro lawn mower. By removing built-up dirt, debris, and residue, you can prevent clogs and improve fuel flow, resulting in a smoother and more efficient operation.
To guide you through the process, here is a table outlining the different components of the carburetor and the corresponding cleaning steps:
| Component | Cleaning Steps | Tools Needed |
|---|---|---|
| Float Bowl | Remove the bowl and clean it with carburetor cleaner. | Screwdriver |
| Jet | Use a small wire or needle to clear any blockages. | Wire/Needle |
| Venturi Tube | Clean the tube with carburetor cleaner and a brush. | Brush |
Remember to follow any specific instructions provided by your Toro lawn mower’s manual. Pay attention to the details and take your time to ensure a thorough cleaning. Once all the components are clean, reassemble the carburetor and test your lawn mower to see the improved performance.
Regular maintenance and cleaning of the carburetor will prolong the life of your Toro lawn mower and keep it running smoothly. So, take the time to clean each component properly and enjoy a well-maintained and efficient machine.
Reassembling the Carburetor
After thoroughly cleaning each component of the carburetor, you can now proceed to reassemble it. Start by placing the float bowl back onto the carburetor body, ensuring that the gasket is properly aligned. Once in place, tighten the screws securely, but be careful not to overtighten and damage the gasket.
Next, reattach the throttle plate to the carburetor body. Make sure the plate is positioned correctly and secure it with the screws provided. Double-check that the plate moves freely and smoothly.
Now, it’s time to reinstall the main jet and emulsion tube. Carefully insert the main jet into the center of the emulsion tube and screw them both into the carburetor body. Be gentle while tightening to avoid stripping the threads.
After that, reconnect the fuel line to the carburetor inlet. Ensure that the hose is securely attached and that there are no leaks. If necessary, use a hose clamp to provide extra security.
Finally, reattach the carburetor to the engine. Line up the mounting holes and insert the bolts. Tighten them evenly, alternating between bolts, to ensure a secure fit.
Once you have reassembled the carburetor, you can proceed to test it by starting the lawn mower. Pay attention to any unusual sounds or signs of malfunction. If everything seems to be working properly, congratulations! You have successfully reassembled your Toro lawn mower carburetor.
Testing and Troubleshooting
Check for any potential issues or malfunctions by testing the reassembled Toro lawn mower carburetor. Once you have reassembled the carburetor, it’s important to ensure that it’s functioning properly before putting it back into your lawn mower.
Here are a few tests and troubleshooting steps you can follow:
- Visual Inspection:
- Look for any signs of damage or wear on the carburetor parts, such as cracks or leaks.
- Check if all the components are properly connected and tightened.
- Fuel Flow Test:
- Turn on the fuel supply and check if fuel flows smoothly into the carburetor.
- Make sure there are no clogs or blockages in the fuel line or fuel filter.
- Starting Test:
- Try starting the lawn mower and observe if it starts easily or if there are any issues.
- Listen for any unusual sounds or vibrations that could indicate a problem.
- Performance Test:
- Run the lawn mower and check if it operates smoothly and consistently.
- Monitor the engine’s performance, including acceleration, idle speed, and overall power output.
Frequently Asked Questions [FAQs]
How Often Should the Toro Lawn Mower Carburetor Be Cleaned?
You should clean your Toro lawn mower carburetor regularly to keep it running smoothly. Regular maintenance is essential for optimal performance and helps prevent issues such as clogging or fuel flow problems.
Can I Use Any Type of Cleaning Solution to Clean the Carburetor Components?
You shouldn’t use just any cleaning solution to clean the carburetor components. It’s important to use a specific carburetor cleaner recommended by Toro to ensure the best results and avoid damaging the parts.
Are There Any Specific Safety Precautions I Should Take When Removing the Carburetor?
When removing the carburetor, it’s important to take specific safety precautions. Make sure the engine is off and cool, wear protective gloves and eyewear, and disconnect the spark plug wire to prevent accidental starting.
What Type of Lubricant Should I Use When Reassembling the Carburetor?
When reassembling the carburetor, use a high-quality lubricant that is specifically designed for small engines. This will help ensure smooth operation and prevent any potential damage or wear.
How Do I Know if the Carburetor Needs to Be Replaced Instead of Just Cleaned?
If your Toro lawn mower carburetor is not responding to cleaning, and you’ve checked for any clogs or damage, it might be time to consider replacing it for optimal performance.
Conclusion
Cleaning the carburetor of your Toro lawn mower is a simple and effective way to ensure its smooth operation.
By following the outlined steps, you can easily remove, disassemble, clean, and reassemble the carburetor.
Remember to test and troubleshoot your mower after cleaning to ensure everything is working properly.
With regular carburetor maintenance, you can keep your Toro lawn mower running efficiently and extend its lifespan.

