Are you tired of your lawn mower not running smoothly? It might be time to clean the carburetor. In this guide, we’ll show you how to clean your lawn mower carburetor step-by-step.
You’ll gather the necessary tools, disconnect the spark plug, remove the carburetor, and disassemble it. Then, you’ll clean all the components and put everything back together.

With our easy-to-follow instructions, your lawn mower will be running like new in no time.
Gather the Necessary Tools
To gather the necessary tools, you’ll need to collect your own set of wrenches and screwdrivers. These tools are essential for cleaning your lawn mower carburetor effectively.
Start by finding a set of wrenches that includes various sizes, as you may encounter different bolts and nuts that require different sizes of wrenches.
It’s also important to have a set of screwdrivers with different types of heads, such as flathead and Phillips, as they’ll allow you to easily remove screws and access different parts of the carburetor.
In addition to wrenches and screwdrivers, you’ll also need safety goggles and gloves to protect yourself during the cleaning process.
Cleaning chemicals like carburetor cleaner and a small brush or toothbrush will be necessary to remove any built-up dirt and grime from the carburetor. A clean rag or towel will also come in handy for wiping away excess cleaner and drying the carburetor.
Once you have gathered all the necessary tools, you’ll be ready to move on to the next step of cleaning your lawn mower carburetor.
Having the right tools at your disposal will make the process smoother and ensure that you can effectively remove any dirt or debris from the carburetor.
Disconnect the Spark Plug
To disconnect the spark plug, grab a pair of insulated pliers and carefully remove the spark plug wire from the spark plug. This step is crucial in ensuring your safety during the cleaning process.
Here are some important points to keep in mind:
- Safety first: Always wear protective gloves and goggles before handling any part of the lawn mower. This will protect you from any potential sparks or debris.
- Inspect the wire: Before removing the spark plug wire, visually inspect it for any signs of damage. If you notice any cracks or fraying, it’s important to replace the wire before proceeding.
- Gently pull: Using your insulated pliers, grasp the spark plug wire firmly but gently. Avoid yanking or forcefully pulling on the wire, as this can damage the wire or the spark plug itself.
- Keep it away: Once the spark plug wire is disconnected, make sure to keep it away from the spark plug. This will prevent any accidental sparking or ignition while you work on cleaning the carburetor.
Remove the Carburetor From the Lawn Mower

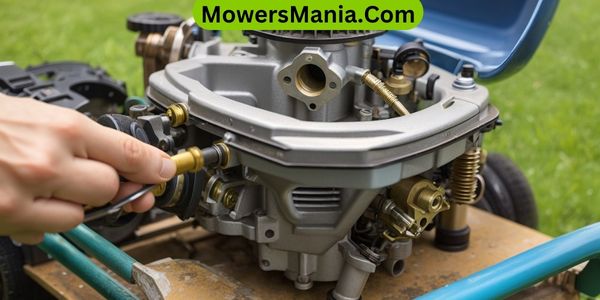
Now, take off the carburetor from your lawn mower.
To begin, locate the carburetor on your mower. It’s usually situated near the engine and is connected to the air filter and fuel line.
Congratulations, you have successfully removed the carburetor from your lawn mower.
Disassemble the Carburetor
To disassemble the carburetor, follow these steps:
- Remove the screws securing the carburetor cover using a screwdriver. Once the cover is removed, you can access the inner components of the carburetor for cleaning and inspection.
- Carefully disconnect the fuel line from the carburetor. This can usually be done by loosening the clamp with a screwdriver and gently pulling the line away.
- Take note of the linkage and throttle plate positions before removing them. This will help you reassemble the carburetor correctly later on.
- Remove the float bowl by unscrewing the retaining bolt or nut. Be cautious not to spill any fuel or damage the gasket.
- Use a small flathead screwdriver to carefully remove the jets and emulsion tube. These components can be delicate, so handle them with care.
Clean the Carburetor Components

You can now clean the components of the carburetor to ensure its proper functioning. Start by removing the float bowl and the float, which are usually held in place by a single screw. Inspect the float for any signs of damage or wear and replace it if necessary.
Next, remove the main jet and the idle jet using a small screwdriver. Make sure to clean these jets thoroughly with a carburetor cleaner or a small wire brush to remove any debris or buildup. Pay close attention to the small holes in the jets and make sure they’re clear and unobstructed.
After cleaning the jets, move on to the needle and seat assembly. Carefully remove the needle and inspect it for any damage or wear. Clean the needle and seat with carburetor cleaner and ensure they’re free of any dirt or debris.
Finally, reassemble all the components back into the carburetor, making sure everything is tightened properly.
Cleaning these carburetor components will help improve the overall performance of your lawn mower.
Frequently Asked Questions [FAQs]
How Often Should I Clean My Lawn Mower Carburetor?
You should clean your lawn mower carburetor at least once a year. Regular maintenance helps ensure optimal performance and prevents clogs that can affect the engine’s fuel efficiency and overall operation.
Can I Clean the Carburetor Without Removing It From the Lawn Mower?
Yes, you can clean the carburetor without removing it from the lawn mower. Use a carburetor cleaner and spray it directly into the carburetor while the engine is running to remove any built-up debris.
What Are the Signs That Indicate a Dirty Carburetor in a Lawn Mower?
If your lawn mower is having trouble starting or running smoothly, it could be a sign of a dirty carburetor. Look for symptoms like sputtering, stalling, or a loss of power.
Is It Necessary to Clean the Carburetor if I Use Fuel Additives Regularly?
If you use fuel additives regularly, it may help prevent carburetor issues, but it’s still necessary to clean the carburetor occasionally. Additives can’t completely eliminate dirt and build-up that can affect performance.
Are There Any Specific Cleaning Solutions or Products Recommended for Cleaning a Lawn Mower Carburetor?
To clean a lawn mower carburetor, you can use specific cleaning solutions or products. They are recommended because they effectively remove dirt and debris, ensuring optimal performance for your mower.
Conclusion
Cleaning your lawn mower carburetor is a simple task that can greatly improve the performance of your mower. By following the outlined steps and using the necessary tools, you can easily disassemble and clean the carburetor components.
Remember to disconnect the spark plug before starting the cleaning process.
Regular maintenance like this will ensure that your lawn mower operates smoothly and efficiently, giving you a well-manicured lawn every time.


