Feeling frustrated with a sputtering lawn mower? It’s time to roll up your sleeves and rebuild its engine. You can do it!
Rebuilding a lawn mower’s engine may seem daunting, but with the right guidance, it’s a manageable task. In this guide, you’ll learn the step-by-step process to diagnose, disassemble, clean, reassemble, and fine-tune the engine.
With some basic tools and a bit of patience, you’ll have your lawn mower purring like new in no time. So, let’s get started and bring your trusty mower back to life!
Diagnosing Engine Issues
First, you should begin by carefully inspecting the lawn mower engine for any visible signs of damage or wear. Look for cracks, worn-out belts, or any loose or disconnected components. Next, check the oil level and quality.
If the oil appears dirty or contains debris, it may indicate internal engine issues. After that, remove the spark plug and examine it for signs of wear, corrosion, or carbon buildup. Additionally, inspect the air filter for clogs or dirt accumulation that may affect engine performance.
Once you have completed the visual inspection, try starting the engine. Listen for any unusual noises such as knocking, grinding, or sputtering, which could indicate internal damage.
Pay attention to any smoke emissions as well, as excessive smoke could be a sign of oil or fuel-related issues.
Furthermore, assess the engine’s power output and responsiveness. If the engine struggles to start or lacks power, it may point to underlying problems.
Gathering Necessary Tools
You will need to gather the following tools before beginning the engine rebuild.
- First, ensure you have a socket set with both metric and standard sockets to fit the various bolts and nuts on the engine.
- A torque wrench is essential for tightening bolts to the correct specifications, preventing over-tightening or under-tightening.
- Additionally, a set of screwdrivers, including both flathead and Phillips head, will be necessary for removing and installing screws and other fasteners.
- A pair of locking pliers can be handy for holding parts in place while you work.
- A gasket scraper will help remove old gaskets and sealant from engine components without causing damage.
- You’ll also need a clean container for storing small engine parts, such as bolts and washers, to prevent them from getting lost.
- Finally, a sturdy workbench or table to work on the engine, along with a shop light for better visibility, will make the process smoother.
With these tools gathered, you’ll be well-prepared to start the engine rebuild process.
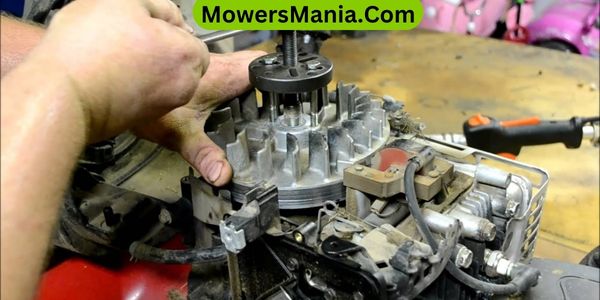
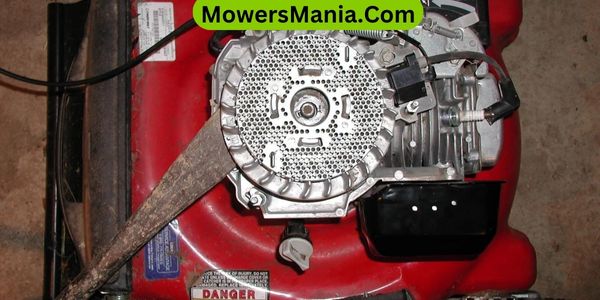
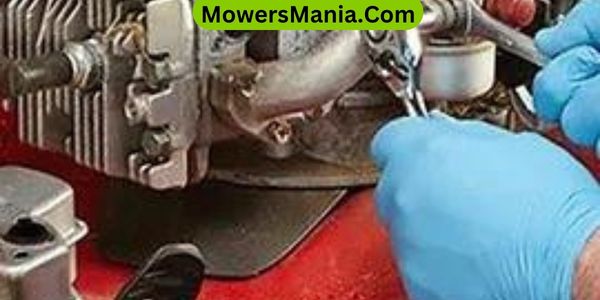
Disassembling Engine Components
To disassemble engine components, start by removing the spark plug using a spark plug socket and a ratchet. This will allow you to safely work on the engine without the risk of accidental ignition.
After removing the spark plug, proceed with the following steps:
- Drain the oil: Locate the oil drain plug at the base of the engine and place an oil pan underneath. Unscrew the plug with a wrench and let the oil drain completely.
- Remove the carburetor: Disconnect the fuel line and throttle linkage. Then, unbolt the carburetor from the engine and carefully set it aside. Be mindful of any gaskets or O-rings that may need to be replaced.
- Take off the muffler: Loosen the bolts that secure the muffler to the engine. Once the bolts are off, gently wiggle the muffler until it comes free from the exhaust port.
- Unbolt the engine housing: Use the appropriate socket or wrench to remove the bolts holding the engine housing in place. Carefully lift off the housing to expose the internal engine components.
Following these steps will allow you to effectively disassemble the necessary components of the lawn mower engine for rebuilding.
Cleaning and Inspecting Parts
After disassembling the engine components, carefully clean and inspect each part to assess its condition and identify any damage or wear.
Use a gentle solvent and a brush to remove any built-up grime or oil from the parts. Once clean, visually inspect each part for signs of wear, cracks, or other damage.
Pay close attention to the piston, piston rings, cylinder walls, and the crankshaft. Look for any discoloration, scoring, or pitting that may indicate a problem. Additionally, check the valves, valve seats, and seals for any signs of wear or damage.
| Parts | Condition |
|---|---|
| Piston | No visible damage |
| Piston Rings | Signs of wear |
| Cylinder Walls | Slight scoring |
| Crankshaft | Surface pitting |
| Valves | Wear on edges |
Carefully documenting the condition of each part will help you determine which parts need to be replaced or repaired.
Once everything is cleaned and inspected, you can proceed with the necessary repairs and reassembly, knowing that your lawn mower engine will be in top condition.
Reassembling Engine Components
Now that you’ve cleaned and inspected the parts, it’s time to reassemble the engine components.
Proper part alignment is crucial to ensure everything fits together correctly. Be sure to follow the torque specifications for components to avoid any issues with the engine’s performance.
Proper Part Alignment
When reassembling the engine components, ensure that all parts are aligned properly using the appropriate tools and techniques. Proper part alignment is crucial for the smooth operation and longevity of your lawn mower’s engine.
Here’s how to ensure everything is aligned correctly:
- Use a torque wrench to tighten bolts to the manufacturer’s specifications, preventing misalignment due to uneven pressure.
- Double-check the alignment of the piston and piston rings to ensure they move smoothly within the cylinder.
- Align the valve train components accurately to prevent interference and ensure proper engine timing.
- Utilize a straight edge and feeler gauges to check the alignment of various engine components, such as the crankshaft and camshaft, for optimal performance.
Following these steps will help you reassemble your lawn mower’s engine with precision, avoiding potential alignment issues.
Torque Specifications for Components
Ensure you torque the components to the manufacturer’s specifications when reassembling the engine, preventing misalignment due to uneven pressure.
Here are the recommended torque specifications for common engine components:
| Component | Torque Specification |
|---|---|
| Cylinder Head Bolts | 18 ft-lbs |
| Spark Plug | 15 ft-lbs |
| Engine Mounting Bolts | 25 ft-lbs |
Following these specifications will help ensure that the components are securely and evenly fastened, reducing the risk of leaks, damage, or premature wear.
Always use a torque wrench to achieve the specified tightness and prevent over-tightening, which can lead to stripped threads or broken bolts.
By adhering to these torque specifications, you’ll contribute to the longevity and optimal performance of your lawn mower’s engine.
Testing and Fine-Tuning
You can begin testing and fine-tuning the rebuilt engine by starting the lawn mower and carefully listening for any unusual sounds or vibrations.
Once the engine is running, follow these steps to ensure that it’s running smoothly:
- Check for Unusual Noises: Listen for any knocking, rattling, or grinding sounds, which could indicate issues with the internal components. Address any abnormal noises promptly to prevent further damage.
- Inspect for Leaks: Look for any signs of oil or fuel leaks around the engine. Leaks can lead to performance issues and potential safety hazards, so it’s crucial to address them immediately.
- Adjust Carburetor Settings: Fine-tune the carburetor to ensure the engine is running at the correct air-to-fuel ratio. This adjustment can optimize performance and fuel efficiency.
- Test Blade Engagement: If your lawn mower has a blade, engage and disengage it to ensure that the engine responds correctly and that the blade operates smoothly.
Frequently Asked Questions [FAQs]
Can I Use a Different Type of Oil When Reassembling the Engine Components?
You can’t use just any oil when reassembling engine components. Make sure to use the oil recommended by the manufacturer to ensure proper lubrication and optimal performance. Using the wrong type of oil could damage the engine.
How Do I Know if the Spark Plug Needs to Be Replaced During the Rebuilding Process?
When rebuilding a lawn mower engine, check the spark plug for signs of wear or damage. If the electrode is worn or the insulator is cracked, it’s time to replace it. A new spark plug can improve engine performance.
What Should I Do if I Accidentally Damage a Component While Disassembling the Engine?
If you accidentally damage a component while disassembling the engine, carefully assess the extent of the damage. Determine if it can be repaired or if a replacement is necessary. Take your time to ensure proper reassembly.
Is It Necessary to Replace the Gaskets and Seals When Reassembling the Engine?
When reassembling the engine, it’s necessary to replace the gaskets and seals to ensure proper sealing and prevent oil leaks. This step is crucial for maintaining the engine’s performance and longevity.
Can I Skip the Cleaning and Inspecting Parts Step if I’m Short on Time?
If you’re short on time, it’s tempting to skip cleaning and inspecting parts when rebuilding a lawn mower engine, but doing so can lead to future problems. It’s essential to ensure all components are in good condition before reassembly.
Conclusion
Now that you’ve learned how to rebuild a lawn mower’s engine, you can confidently tackle any issues that arise.
Remember to diagnose the problem, gather the necessary tools, disassemble, clean and inspect parts, reassemble, and test the engine.
With proper maintenance and care, your lawn mower will be running smoothly for years to come.
Happy mowing!

