
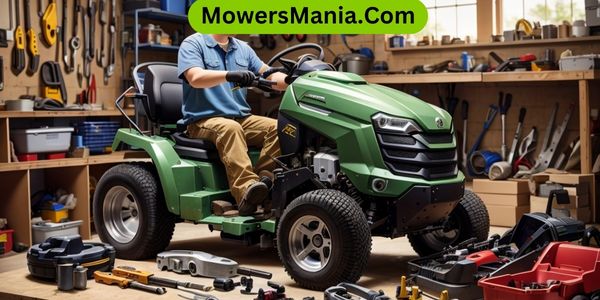
Are you tired of your riding lawn mower not working properly? In this article, we will show you how to repair it in just a few simple steps.
From checking the fuel system to troubleshooting the ignition system, we’ve got you covered.
You’ll also learn how to inspect and clean the air filter, repair or replace the mower blades, and adjust and maintain the drive system.
Get ready to get your lawn mower up and running again!
Simple Ways To Repair A Riding Lawn Mowers
1.Checking the Fuel System
To check the fuel system of your riding lawn mower, start by inspecting the fuel tank for any signs of damage or leaks. This is crucial to ensuring that your mower is running smoothly and efficiently.
Begin by removing the fuel cap and carefully examining the tank for any cracks, dents, or rust. If you notice any damage, it’s important to replace the tank immediately to prevent fuel leaks and potential hazards.
Additionally, check the fuel lines for any signs of wear or deterioration. Look for any cracks, bulges, or leaks along the lines. If you notice any issues, it’s recommended to replace the fuel lines as soon as possible.
Next, inspect the fuel filter. It’s usually located between the fuel tank and the carburetor. Remove the filter and check for any clogs or debris. If the filter is dirty or clogged, it should be replaced to ensure proper fuel flow.
Finally, check the fuel pump if your riding lawn mower is equipped with one. Ensure that it’s securely connected and functioning correctly.
2.Inspecting and Cleaning the Air Filter
Are you wondering how to properly inspect and clean the air filter of your riding lawn mower? Regular maintenance of the air filter is essential for the efficient operation of your mower.
Over time, the air filter can become clogged with dirt, debris, and grass clippings, which can restrict the airflow and cause the engine to run poorly.
To ensure that your mower continues to perform at its best, follow these simple steps to inspect and clean the air filter.
Start by locating the air filter housing, which is typically located near the carburetor. Remove the cover and carefully take out the air filter.
Inspect the filter for any signs of damage or excessive dirt buildup. If the filter is damaged or excessively dirty, it’s best to replace it with a new one. However, if the filter is only mildly dirty, it can be cleaned.
To clean the air filter, gently tap it against a hard surface to remove loose dirt and debris. If necessary, use a soft brush or compressed air to further clean the filter.
Be careful not to damage the filter in the process. Once cleaned, reinsert the filter into the housing, ensuring it’s properly seated. Finally, replace the cover and secure it in place.
3.Troubleshooting the Ignition System
If your riding lawn mower is experiencing ignition problems, start by checking the spark plug. The spark plug is a crucial component of the ignition system and can often be the cause of starting issues.
Begin by removing the spark plug wire from the spark plug and using a spark plug socket, carefully unscrew the plug from the engine.
Inspect the spark plug for any signs of damage, such as a cracked porcelain insulator or worn electrode. If the spark plug appears worn or damaged, it’s recommended to replace it with a new one.
However, if the spark plug looks fine, you may want to test it for proper spark. Reattach the spark plug wire to the plug and position the metal part of the plug against the engine block.
Have someone else try to start the mower while you observe for a spark. If there’s no spark or a weak spark, then the spark plug may need to be replaced.
Troubleshooting the ignition system can be a bit tricky, but starting with the spark plug is a good first step.
4.Repairing or Replacing the Mower Blades
Once you have addressed any ignition issues, the next step in repairing your riding lawn mower is to focus on repairing or replacing the mower blades.
The blades are an essential component of your mower, as they’re responsible for cutting the grass evenly and efficiently. Over time, the blades can become dull, bent, or damaged, which can affect the quality of your lawn maintenance.
To begin, park your mower on a flat surface and disconnect the spark plug wire for safety. Carefully inspect the blades for any signs of wear or damage.
If the blades are dull, you can sharpen them using a file or grinder. However, if the blades are bent or severely worn, it’s best to replace them entirely.
Remove the old blades by loosening the blade bolts and carefully lifting them off the spindle. Install the new blades by aligning them with the spindle and tightening the blade bolts securely. Remember to always consult your mower’s manual for specific instructions and safety precautions.
With sharp and properly functioning mower blades, your lawn will be looking pristine in no time.
5.Adjusting and Maintaining the Drive System
To ensure optimal performance, regularly adjust and maintain the drive system of your riding lawn mower. The drive system is responsible for transmitting power from the engine to the wheels, allowing your mower to move forward or backward.
Over time, the drive system may become misaligned or worn out, which can result in poor performance or even damage to other components.
To adjust the drive system, start by checking the tension of the drive belt. If it’s loose or damaged, replace it with a new one. Next, inspect the pulleys and idler arm for any signs of wear or damage. If necessary, replace these components as well.
Additionally, lubricate the drive system regularly to reduce friction and ensure smooth operation. Finally, don’t forget to check the transmission fluid levels and top up if necessary.
Frequently Asked Questions [FAQs]
How Often Should I Change the Spark Plug on My Riding Lawn Mower?
You should change the spark plug on your riding lawn mower every season or after 25 hours of use. Regularly replacing the spark plug helps ensure proper ignition and keeps your mower running smoothly.
What Type of Fuel Should I Use in My Riding Lawn Mower?
You should use gasoline with an octane rating of 87 or higher in your riding lawn mower. This will ensure optimal performance and prevent damage to the engine. Avoid using ethanol-blended fuels as they can cause carburetor issues.
How Do I Know if My Lawn Mower’s Battery Needs to Be Replaced?
If your riding lawn mower’s battery is not holding a charge or fails to start the engine, it may need to be replaced. Look for signs like dim lights or difficulty starting.
Can I Use a Universal Blade on My Riding Lawn Mower, or Do I Need a Specific Brand/Model?
You can use a universal blade for your riding lawn mower, but it’s best to check the manufacturer’s recommendations to ensure compatibility with your specific brand and model.
How Frequently Should I Grease the Drive System Components on My Riding Lawn Mower?
You should grease the drive system components on your riding lawn mower regularly to maintain optimal performance. It is recommended to do this every 25 hours of use or at least once a season.
Conclusion
In conclusion, by following these steps, you can easily repair your riding lawn mower.
Checking the fuel system, inspecting and cleaning the air filter, troubleshooting the ignition system, and repairing or replacing the mower blades are all essential tasks.
Additionally, adjusting and maintaining the drive system ensures smooth operation. With a little effort and attention to detail, your riding lawn mower will be back in top shape in no time.

