Are you tired of struggling with a broken pull cord on your lawn mower? In this article, we’ll show you how to replace it quickly and easily.
With a few simple tools and some basic steps, you’ll have your mower up and running again in no time. Say goodbye to frustration and get ready to tackle your lawn with confidence.
Let’s get started!

Tools Needed
To replace the pull cord on your lawn mower, you’ll need a few essential tools.
With these tools in hand, you’ll be well-equipped to successfully replace the pull cord on your lawn mower.
How To Replace A Lawn Mower Pull Cord? (Step-By-Step)
1. Removing the Old Pull Cord
To remove the old pull cord on your lawn mower, you’ll need to disassemble the recoil starter housing.
This housing is usually located on the side of the lawn mower engine. Start by removing any screws or bolts securing the housing to the engine. Once the housing is loose, carefully lift it off the engine, being mindful of any attached wires or components.
Inside the recoil starter housing, you’ll find the old pull cord wound around a pulley. To remove the old cord, you’ll need to unwind it from the pulley.
Take note of how the cord is threaded through any holes or notches on the pulley, as this will be important when installing the new cord.
With the old cord removed, inspect the pulley for any signs of wear or damage. If the pulley is worn or damaged, it’s recommended to replace it to ensure proper functioning of the recoil starter. You can find replacement pulleys at your local hardware store or online.
Once the old pull cord and pulley have been removed, you can proceed to the next step of replacing the pull cord on your lawn mower.
2. Preparing the New Pull Cord
Get the new pull cord ready for installation by following these steps.
With the new pull cord prepared, you’re now ready to move on to the next step of installing it onto your lawn mower.
3. Installing the New Pull Cord

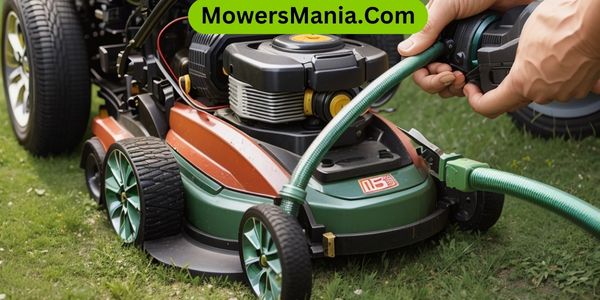
Now, let’s move on to installing the new pull cord on your lawn mower, ensuring that it’s done correctly and securely.
To begin, thread the new pull cord through the hole in the starter housing and pull it all the way through until you have equal lengths on both sides.
Next, tie a knot at the end of the cord to prevent it from slipping back through the hole. Make sure the knot is tight and secure.
After securing the knot, wind the pull cord around the pulley inside the starter housing. This pulley is responsible for retracting the cord after each use. Make sure to wind the cord in the direction indicated by the arrows on the pulley.
Once the cord is wound properly, feed the loose ends through the holes in the starter housing and attach the handle to the ends of the cord. Ensure that the handle is securely attached and won’t come loose during use.
Before testing the new pull cord, make sure to release any tension on the pulley by gently pulling the cord out and allowing it to retract. This will help prevent any potential damage to the cord or the recoil mechanism.
4. Testing the Pull Cord
Once you have installed the new pull cord on your lawn mower, it’s important to test its functionality before using it.
Testing the pull cord ensures that it’s properly installed and in good working condition. To test the pull cord, follow these simple steps.
Now, grasp the handle of the pull cord firmly and give it a gentle tug. The cord should extend smoothly and retract back into the mower without any resistance. If the cord doesn’t extend or retract properly, it may be a sign of a problem with the installation.
In addition to checking the functionality of the pull cord, also pay attention to the tension. The cord should have enough tension to retract fully, but not too much that it’s difficult to pull.
If you notice any issues with the pull cord during testing, it may be necessary to recheck the installation or seek professional help. Remember, a properly functioning pull cord is essential for starting your lawn mower safely and efficiently.
Frequently Asked Questions [FAQs]
What Type of Lubricant Should I Use on the Pull Cord Mechanism of My Lawn Mower?
To properly lubricate the pull cord mechanism on your lawn mower, use a lightweight oil or silicone spray. This will help reduce friction and ensure smooth operation. Avoid using heavy grease or WD-40.
Can I Use a Different Type of Rope or Cord as a Replacement for the Pull Cord?
Yes, you can use a different type of rope or cord as a replacement for the pull cord on your lawn mower. Just make sure it is strong enough and the right length.
How Often Should I Replace the Pull Cord on My Lawn Mower?
You should replace the pull cord on your lawn mower when it becomes frayed, worn, or broken. Regular maintenance and inspections can help you identify when it’s time for a replacement.
Is It Necessary to Remove the Lawn Mower’s Engine Cover to Replace the Pull Cord?
No, you don’t need to remove the engine cover to replace the pull cord on your lawn mower.
Just follow these steps:
- Remove the old cord
- Attach the new cord
- Wind it up, and
- Test it out.
What Should I Do if the Pull Cord on My Lawn Mower Keeps Getting Stuck or Won’t Retract Properly?
If the pull cord on your lawn mower keeps getting stuck or won’t retract properly, you can try lubricating the mechanism, checking for any tangled or frayed cord, or replacing the recoil starter assembly if necessary.
Conclusion
Replacing the pull cord on a lawn mower is a relatively simple task that can be done with a few basic tools. By following the steps outlined in this article, you can successfully remove and replace the old pull cord with a new one.
Once installed, testing the pull cord ensures that it’s working properly and your lawn mower is ready to go.
Don’t let a broken pull cord prevent you from maintaining a well-manicured lawn!

