
If you’ve ever had a riding lawn mower tire fall off the rim, you know how frustrating it can be. But don’t worry, refilling the tire is easier than you might think.
With a few simple steps, you can have your tire back on the rim and ready to roll in no time.
Just follow these directions to get your mower back in action.
Assessing the Tire Damage
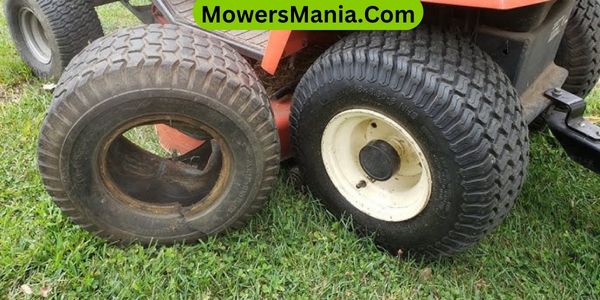
To assess the damage to your riding lawn mower tire that fell off the rim, carefully examine the entire surface for any signs of cuts, punctures, or excessive wear.
Start by checking the outer tread for any visible cuts or tears, as these can lead to air leaks and affect the tire’s performance.
Then, move on to inspect the sidewalls for any signs of damage, such as bulges or cracks, which can compromise the structural integrity of the tire.
Additionally, look for any punctures, such as nails or sharp objects embedded in the tire, as these can cause air leaks and lead to rapid deflation.
Next, pay close attention to the inner surface of the tire that came into contact with the rim. Check for any abrasions, excessive wear, or signs of friction, as these can indicate issues with the rim or improper installation that led to the tire falling off.
Removing the Tire From the Rim
You can begin the process of removing the tire from the rim by using a tire iron or a pry bar to carefully separate the tire bead from the rim.
Start by deflating the tire completely and then place the wheel on a flat surface. Position the tire iron or pry bar under the edge of the tire and apply pressure to lift the bead over the rim.
Work your way around the tire, gradually loosening the bead from the rim. It may require some effort, but be patient and work carefully to avoid damaging the tire or the rim.
Once one side of the tire bead is free from the rim, flip the wheel over and repeat the process on the other side. Continue using the tire iron or pry bar to separate the tire bead from the rim.
As you work your way around, the tire will gradually loosen from the rim. Once both sides of the tire are free from the rim, carefully lift the tire off the wheel.
Removing the tire from the rim can be a bit challenging, but with the right tools and technique, it can be done effectively.
Repairing the Tire and Rim
After you have successfully removed the tire from the rim, you can inspect the tire and rim for any damage or issues that may need repairing.
Look for any punctures, cuts, or bulges on the tire that could compromise its integrity. Check the rim for any bends, cracks, or rust that could affect its ability to hold the tire securely.
If you notice any of these issues, it’s important to address them before reassembling the tire and rim.
Here are four key steps to consider when repairing the tire and rim:
- Assess the Tire: Carefully examine the entire surface of the tire for any signs of damage, including cuts, punctures, or bulges. This will help ensure that the tire is in good condition and safe to use.
- Inspect the Rim: Check the rim for any bends, cracks, or rust that could affect its structural integrity. Addressing any issues with the rim will help ensure a secure fit for the tire.
- Repair or Replace: Depending on the extent of the damage, decide whether the tire or rim needs to be repaired or replaced. This will help maintain the safety and performance of your riding lawn mower.
- Seek Professional Help: If you’re unsure about how to repair the tire or rim, or if the damage is extensive, consider seeking professional assistance to ensure the job is done correctly and safely.
Refilling the Tire With Air
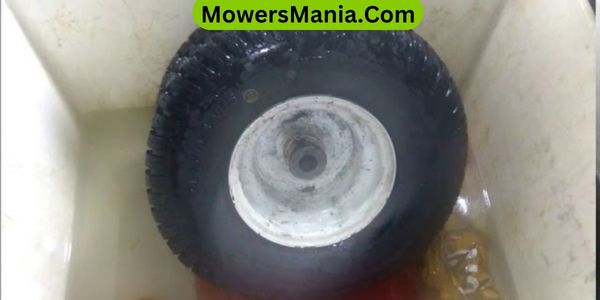
Once you have repaired any damage to the tire and rim, use a pressure gauge to check the current air pressure in the tire before refilling it with the recommended PSI. First, remove the valve cap from the tire’s valve stem.
Then, attach the air compressor hose to the valve stem. Turn on the compressor and carefully monitor the pressure, periodically checking with the pressure gauge to ensure you don’t overfill the tire.
Stop filling the tire once it reaches the recommended PSI. If you accidentally overfill the tire, use the pressure gauge to release the excess air until it reaches the correct pressure.
Once the tire is filled to the proper PSI, remove the air compressor hose and securely replace the valve cap.
After refilling the tire, it’s important to visually inspect the tire and rim to ensure that there are no signs of air leaks.
If everything looks good, you can proceed to remount the tire onto the riding lawn mower.
Mounting the Tire Back on the Rim
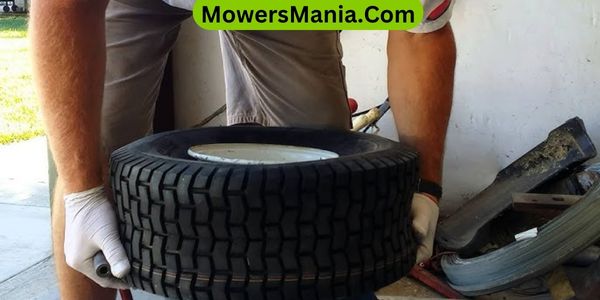
After refilling the tire with the recommended PSI, carefully align the tire with the rim and begin mounting it back onto the rim by using tire irons or a mounting tool.
First, position the tire onto the rim, ensuring that the valve stem is correctly aligned with the rim hole.
Then, use tire irons or a mounting tool to ease the tire over the rim, working methodically around the tire to avoid pinching the inner tube. It may require some effort, but take your time and work patiently to prevent damaging the tire or causing injury.
Once the tire is partially on the rim, continue using the tire irons or mounting tool to carefully work the remaining section of the tire onto the rim. As you near the end, use your hands to push and pull the tire until it’s entirely mounted on the rim.
Finally, double-check that the tire is evenly seated on the rim and that the valve stem is straight before inflating it to the recommended PSI.
- Be patient and take your time to avoid damaging the tire or causing injury.
- Check that the valve stem is correctly aligned with the rim hole before mounting the tire.
- Use tire irons or a mounting tool to ease the tire over the rim, working methodically around the tire.
- Double-check the tire’s position on the rim and the valve stem alignment before inflating it.
Frequently Asked Questions [FAQs]
How Can I Prevent My Riding Lawn Mower Tire From Falling off the Rim in the Future?
To prevent your riding lawn mower tire from falling off the rim in the future, regularly check the tire pressure and ensure it’s properly inflated. Inspect the rim for any damage and tighten the lug nuts securely to keep the tire in place.
Can I Use a Different Type of Tire Sealant or Repair Kit for a Riding Lawn Mower Tire?
You can use a different type of tire sealant or repair kit for a riding lawn mower tire, but make sure it’s suitable for tubeless tires and compatible with your specific tire material to ensure effective sealing.
Is It Necessary to Replace the Valve Stem When Repairing a Riding Lawn Mower Tire?
When repairing a riding lawn mower tire, it’s not always necessary to replace the valve stem. If the stem is in good condition, you can usually reuse it. Just make sure it’s securely in place.
What Are the Signs That a Riding Lawn Mower Tire Needs to Be Replaced Instead of Repaired?
If you notice extensive cracks, bulges, or severe tread wear on your riding lawn mower tire, it’s time to replace it instead of repairing. These signs indicate potential safety hazards and a need for a new tire.
Are There Any Specific Safety Precautions I Should Take When Refilling a Riding Lawn Mower Tire With Air?
When refilling a riding lawn mower tire with air, ensure the mower is turned off. Use a tire gauge to check the current pressure. Wear eye protection and stand clear of the tire while inflating.
Conclusion
Now that you’ve refilled your riding lawn mower tire that fell off the rim, you can get back to mowing your lawn without any interruptions.
Remember to regularly check your tire pressure and inspect for any damage to prevent future issues.
With these simple steps, you can easily fix a tire that has fallen off the rim and keep your lawn mower running smoothly.
Happy mowing!

