
If your lawn mower’s clutch is acting up, you’ll want to get it fixed quickly. In this guide, we’ll show you how to repair the clutch on your lawn mower.
You’ll learn the safety precautions, tools needed, and step-by-step instructions for accessing, inspecting, and repairing the clutch.
By the end, you’ll be back to mowing your lawn with ease.
Safety Precautions
Before you begin working on the clutch of your lawn mower, it’s important to ensure that you have taken all necessary safety precautions.
- Start by turning off the lawn mower and removing the spark plug wire to prevent accidental starts.
- Let the engine cool down if it has been running.
- Always wear protective gear, including gloves and safety goggles, to shield yourself from any potential debris or oil.
- Additionally, make sure to work in a well-ventilated area to avoid inhaling harmful fumes.
When lifting the lawn mower, remember to bend your knees and use your leg muscles to avoid straining your back.
- Never attempt to work on the clutch or any other part of the mower while the engine is running.
- It’s crucial to read the manufacturer’s manual before attempting any repairs, as it provides specific instructions and safety information.
- Double-check that the lawn mower is on a flat, stable surface before beginning any repair work.
By following these safety precautions, you can minimize the risk of accidents or injuries while repairing the clutch on your lawn mower.
- Always prioritize safety to ensure a successful and secure repair process.
Tools and Materials Needed
You’ll need to gather the required tools for the job, such as a socket set, screwdrivers, and pliers.
Additionally, make sure to check off the essential materials from the checklist, including a new clutch kit and lubricating oil.
Required Tools List
You will need the following tools and materials to repair the clutch on a lawn mower.
| Tools | Materials |
|---|---|
| Socket wrench set | Replacement clutch |
| Screwdriver | Grease |
| Pliers | Safety gloves |
| Jack or lift | Shop rags |
| Torque wrench |
Using the socket wrench set, screwdriver, and pliers, you can easily remove the old clutch. Once removed, apply grease to the new replacement clutch before installing it.
Make sure to wear safety gloves when working with the clutch to prevent any injuries. A jack or lift will help you raise the mower for easier access to the clutch.
Finally, use a torque wrench to securely fasten the clutch in place. With these tools and materials, you’ll be able to successfully repair the clutch on your lawn mower.
Essential Materials Checklist
To repair the clutch on a lawn mower, you’ll need the following essential tools and materials.
- First, you’ll need a socket wrench set with both metric and standard sizes to fit various bolts on the mower.
- Additionally, have a pair of safety goggles to protect your eyes from any debris that may come loose during the repair.
- A new clutch kit specific to your lawn mower model is crucial for replacement.
- You’ll also need a torque wrench to ensure that the bolts are tightened to the manufacturer’s specifications.
- It’s essential to have a shop rag or paper towels to clean any grease or dirt from the clutch area.
- Lastly, have a sturdy pair of work gloves to protect your hands from sharp edges and heat.
Equipment Preparation Steps
Once you have gathered the essential tools and materials listed in the previous subtopic, begin by laying them out in a well-lit and organized workspace. This will ensure that everything you need is easily accessible and ready for use.
Here are the tools and materials you’ll need for repairing the clutch on a lawn mower:
- Socket set with various sizes
- Screwdrivers (both flathead and Phillips)
- Safety goggles and gloves
- Replacement clutch kit
Having these items at hand will make the repair process smoother and more efficient. Take a moment to inspect the tools and ensure they’re in good working condition. Additionally, double-check that you have all the necessary materials before starting the repair.
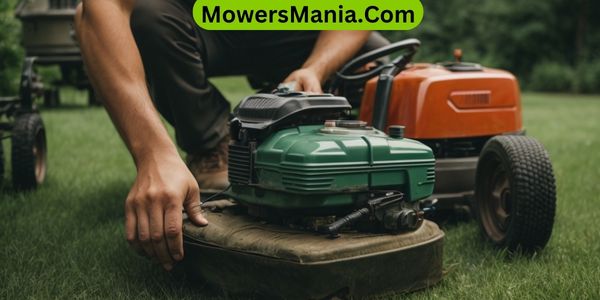
Accessing the Clutch Assembly
To access the clutch assembly on your lawn mower, first disconnect the spark plug wire to ensure safety while working on the engine.
Then, follow these steps to access the clutch assembly:
| Steps | Description |
|---|---|
| 1. Position the mower | Place the mower on a flat, stable surface and let the engine cool down. |
| 2. Remove the mower deck | Unscrew and remove the bolts holding the mower deck in place. |
| 3. Locate the clutch assembly | Look for the clutch assembly, usually positioned near the engine. |
| 4. Access the clutch assembly | Depending on the mower model, you may need to remove additional covers. |
| 5. Inspect the clutch assembly parts | Check for any signs of wear, damage, or debris that may be affecting it. |
Following these steps will allow you to effectively access the clutch assembly on your lawn mower. Remember to consult your mower’s manual for specific instructions related to your mower model.
Inspecting and Diagnosing Issues
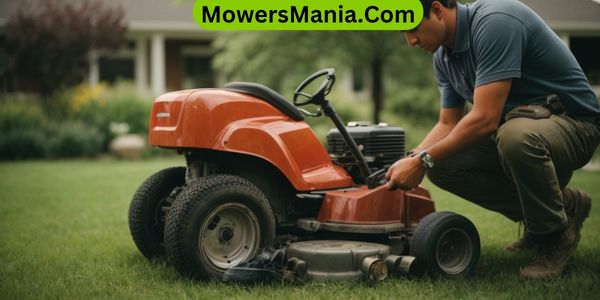
Before you start the repair process, it’s essential to visually inspect the clutch for any signs of wear or damage.
Look for worn-out parts or any abnormalities that may indicate common clutch problems. Identifying these issues upfront will help you determine the necessary steps for a successful repair.
Visual Inspection for Wear
Inspect the clutch for wear and damage by following these visual inspection steps:
- Check the Clutch Surface: Look for signs of wear, such as grooves or discoloration on the clutch surface. Any unevenness indicates the need for replacement.
- Inspect the Springs: Ensure that the clutch springs are intact and not showing signs of excessive wear or corrosion. Weak or damaged springs can lead to clutch slippage.
- Examine the Engagement Mechanism: Inspect the engagement mechanism for any loose or damaged parts. Ensure that the clutch engages and disengages smoothly without any jerking or sticking.
- Assess the Clutch Housing: Check the clutch housing for cracks, warping, or other damage. Any abnormalities in the housing can affect the clutch’s performance.
Regular visual inspections will help you identify wear and diagnose potential issues with the lawn mower clutch.
Identifying Common Clutch Problems
After completing the visual inspection for wear on the clutch, you can now begin identifying common clutch problems by inspecting and diagnosing issues with the engagement mechanism and other components.
Start by checking for any signs of slipping or difficulty in engaging the clutch when you try to mow the lawn. Inspect the clutch cable for any fraying, stretching, or kinking, as these can cause problems with the clutch engagement.
Additionally, check the clutch lever and spring for proper tension and alignment. Ensure that the clutch linkage is properly lubricated and not binding.
Lastly, examine the clutch pulley and belt for any wear or damage that may affect the clutch’s performance.
Repairing or Replacing the Clutch
If your lawn mower’s clutch is malfunctioning, you can either repair it or replace it to restore proper functionality.
Here are the options to consider:
- Repairing the Clutch: If the issue is minor, such as a loose cable or worn-out springs, you can attempt to repair the clutch. Start by disconnecting the spark plug to ensure safety. Then, disassemble the clutch assembly, inspect the components for damage, and replace any worn-out parts. Once the necessary repairs are made, reassemble the clutch and test the mower to ensure the issue is resolved.
- Replacing the Clutch Components: If the clutch is severely damaged or worn beyond repair, consider replacing the individual components, such as the clutch cable, springs, or pulleys. This option allows you to address specific worn-out parts without replacing the entire clutch assembly.
- Replacing the Entire Clutch Assembly: In cases of extensive damage or if the clutch is beyond repair, replacing the entire clutch assembly may be necessary. This involves removing the old clutch assembly and installing a new one, ensuring proper alignment and tension.
- Seeking Professional Help: If you’re unsure about repairing or replacing the clutch, it’s advisable to seek professional assistance from a lawn mower mechanic or a repair shop. They can provide expert guidance and ensure the clutch is properly serviced.
Reassembling and Testing the Clutch
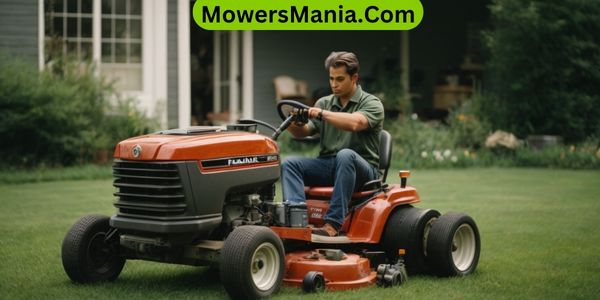
To reassemble and test the clutch, reconnect the spark plug and carefully align the clutch components for proper engagement.
Begin by placing the clutch assembly back onto the engine crankshaft, ensuring that it’s positioned correctly. Tighten the bolt securely to hold the clutch in place.
Next, reconnect the clutch cable to the control arm and adjust it to the proper tension. Make sure the cable moves smoothly without any binding or excessive slack.
After reassembling the clutch, start the lawn mower and engage the blades to test the clutch. Observe the engagement of the clutch when the blades are turned on and off. The clutch should smoothly and promptly disengage when you release the blade engagement lever or switch.
If the clutch doesn’t engage or disengage properly, recheck the alignment of the components and the tension of the clutch cable. Additionally, listen for any unusual noises or vibrations that could indicate a problem with the clutch assembly.
Frequently Asked Questions [FAQs]
Can I Use a Different Type of Clutch Than the One Specified for My Lawn Mower?
Yes, you can use a different type of clutch, but it’s important to ensure compatibility with your lawn mower’s specifications. Using an incompatible clutch may cause issues with performance and could potentially damage your mower.
How Often Should I Replace the Clutch on My Lawn Mower?
You should replace the clutch on your lawn mower every 200-250 hours of use. Regular maintenance is crucial to ensure optimal performance. If you notice any signs of wear or slippage, it’s best to replace it sooner.
Can I Repair the Clutch Myself, or Do I Need to Take It to a Professional?
You can repair the clutch yourself if you have the right tools and knowledge. However, if you’re unsure, it’s best to take it to a professional. Safety and proper functionality are essential when dealing with a lawn mower.
What Are the Signs That My Lawn Mower Clutch Needs to Be Replaced?
If your lawn mower clutch is showing signs of slipping, making strange noises, or not engaging properly, it may need to be replaced. These issues can affect the mower’s performance and should be addressed promptly.
Are There Any Common Mistakes to Avoid When Repairing the Clutch on a Lawn Mower?
When repairing the clutch on a lawn mower, avoid forcing parts together, neglecting proper lubrication, and using incorrect tools. Rushing through the process can lead to further damage and safety hazards.
Conclusion
Now that you have repaired the clutch on your lawn mower, it’s time to test it out.
Start the mower and engage the clutch to see if it’s working properly. If everything is functioning as it should, then you can confidently use your lawn mower again.
Remember to always prioritize safety when working with machinery, and don’t hesitate to seek professional help if needed.
Happy mowing!

