
If you’ve ever struggled with a broken pull string on your lawn mower, don’t worry – you can easily replace it yourself.
With just a few tools and some simple steps, you’ll have your mower up and running in no time.
In this article, we’ll show you how to replace a pull string on a lawn mower, with easy-to-follow instructions and maintenance tips to keep it running smoothly.
Tools and Materials Needed
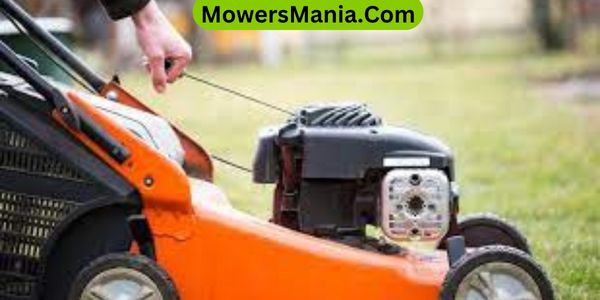
You will need a screwdriver to remove the cover and access the pull string mechanism. Once the cover is off, you should have access to the pull string assembly.
The next tool you’ll need is a pair of needle-nose pliers to remove the old, frayed pull string. Use the pliers to carefully untie the knot securing the old string to the mower. Then, pull the remaining bits of the old string out and discard them.
After removing the old string, you’ll need to measure and cut a new length of pull string. Make sure to use the same thickness and type of string as the original. Once the new string is cut, use the needle-nose pliers to tie a secure knot at one end of the string.
After the knot is secure, carefully thread the other end of the string through the hole in the mower cover and the pull mechanism.
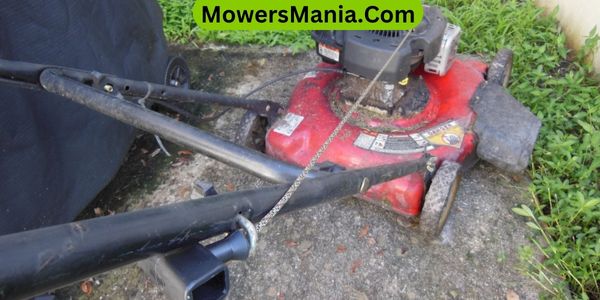
Removing the Old Pull String
After removing the cover and accessing the pull string mechanism, use the needle-nose pliers to carefully untie the knot securing the old string to the mower.
Here’s how to do it:
- Secure the Mechanism: Before you remove the old string, make sure to secure the mechanism so it doesn’t recoil back into the mower. You can do this by holding the mechanism in place with your hand or using a clamp to keep it steady.
- Untie the Knot: Once the mechanism is secured, use the needle-nose pliers to carefully untie the knot that’s securing the old string to the mower. Take your time with this step to avoid damaging the mechanism or the string.
- Remove the Old String: After untying the knot, gently pull the old string out of the mower. Be mindful of any resistance or snags that may occur as you remove the string.
Following these steps will help you safely and effectively remove the old pull string from your lawn mower.
Installing the New Pull String
To install the new pull string on your lawn mower, begin by threading one end of the string through the hole in the recoil starter.
Follow these steps to ensure the string is properly installed:
| Step | Instructions |
|---|---|
| 1 | Thread one end of the new pull string through the hole in the recoil starter. |
| 2 | Tie a secure knot at the end of the pull string to prevent it from slipping back through the hole. |
| 3 | Wind the pull string around the recoil starter pulley, ensuring it is coiled tightly and evenly. |
| 4 | Once the string is wound, secure the other end of the pull string to the handle, making sure it is tightly tied to prevent slippage. |
After completing these steps, give the pull string a gentle tug to ensure it retracts properly. If it retracts smoothly, your new pull string is successfully installed and ready for use.
Now you can proceed with reassembling the recoil starter and testing the functionality of your lawn mower.
Testing the Replacement
Once the replacement pull string is installed, test its functionality by giving it a gentle tug to ensure smooth retraction. This step is crucial to verify that the new pull string is properly installed and will function as intended.
Here’s what you should do:
- Gentle Tug: Give the pull string a gentle but firm tug to ensure that it retracts smoothly without any resistance. This will help you confirm that the string is properly wound around the recoil pulley and that the spring mechanism is functioning correctly.
- Multiple Tugs: Test the pull string multiple times to ensure consistent retraction. Pull it with varying degrees of force to simulate the different conditions under which you might need to start the lawn mower.
- Visual Inspection: While testing the pull string, visually inspect the recoil mechanism to ensure that the string retracts fully and neatly onto the pulley. Look for any signs of fraying or tangling that may indicate an installation issue.
Maintenance Tips for Pull String Longevity

To ensure the longevity of your pull string, regularly inspect for signs of wear and fraying, and lubricate the recoil mechanism as recommended by the manufacturer. Check the pull string for any signs of fraying, as this can lead to breakage and failure.
If you notice any wear or damage, it’s crucial to replace the pull string promptly to prevent unexpected breakdowns.
Additionally, keep the recoil mechanism well-lubricated to ensure smooth operation and reduce wear on the pull string. Refer to the lawn mower’s manual for the type of lubricant recommended for the recoil mechanism.
When using the lawn mower, avoid yanking the pull string aggressively, as this can cause unnecessary strain and wear. Instead, use a smooth and controlled pulling motion to start the engine.
After each use, take a moment to inspect the pull string and recoil mechanism for any issues. By staying proactive and addressing any signs of wear or damage promptly, you can extend the life of your pull string and ensure that your lawn mower starts reliably every time.
Frequently Asked Questions (FAQs)
Can a Broken Pull String Cause Other Damage to the Lawn Mower?
Yes, a broken pull string can cause other damage to the lawn mower. When the pull string is broken, it can lead to internal damage or strain on the engine if not addressed promptly.
Is It Possible to Prevent the Pull String From Breaking in the Future?
To prevent the pull string from breaking in the future, regularly inspect it for signs of wear and tear, and replace it if necessary. Avoid yanking the string too forcefully. Keep the pull string clean and lubricated for smoother operation.
What Should I Do if the Pull String Keeps Getting Stuck or Jammed?
If the pull string keeps getting stuck or jammed, try checking for any debris or tangles in the mechanism. Clean and lubricate the parts if needed. If the issue persists, consider seeking professional help.
Can I Use a Different Type of Rope for the Pull String, or Does It Have to Be a Specific Material?
Yes, you can use a different type of rope for the pull string, but it’s essential to choose a durable material that can withstand the tension and friction. Nylon or polyester ropes are common choices.
How Often Should I Replace the Pull String on My Lawn Mower?
You should replace the pull string on your lawn mower every 1-2 years, or sooner if it’s frayed or damaged. Regular maintenance ensures smooth starts and prevents unexpected breakdowns. It’s an essential part of mower care.
Conclusion
Now that you know how to replace a pull string on a lawn mower, you can tackle this common maintenance task with confidence.
With the right tools and materials, and by following the simple steps outlined in this article, you can keep your lawn mower in top working condition.
Remember to test the replacement pull string and follow maintenance tips to ensure its longevity.
Happy mowing!

