Thinking your lawn mower is beyond repair because of a cracked engine block? Think again. With the right tools and a little know-how, you can get your mower up and running again.
This guide will walk you through the steps to repair a cracked engine block so you can get back to maintaining your lawn.
From identifying the crack to applying the repair solution, you’ll be able to tackle this project with confidence. Let’s roll up our sleeves and get that mower back in action!
Identifying the Cracked Engine Block
How can you determine if your lawn mower has a cracked engine block?
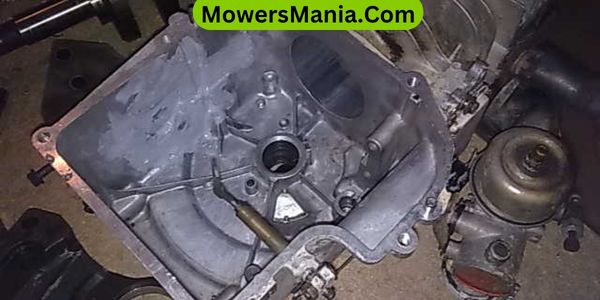
One way to identify a cracked engine block is through visual inspection. Look for any visible cracks, especially around the cylinder walls and the areas where the coolant circulates.
Additionally, check for any signs of coolant leaks, such as puddles or stains under the mower after use.
Another indicator of a cracked engine block is the presence of white smoke coming from the exhaust, which could signal coolant entering the combustion chamber.
Furthermore, if the engine overheats frequently despite proper maintenance and coolant levels, it could be a sign of a cracked block causing the coolant to leak and the engine to overheat.
Pay attention to any unusual knocking or tapping sounds, as these could also indicate a cracked block affecting the engine’s performance.
Lastly, if you notice a drop in overall power and performance, it might be a result of a cracked engine block affecting the combustion process.
Identifying these signs early can help prevent further damage and costly repairs down the line.
Gathering the Necessary Tools and Equipment
You will need to gather the essential tools for the repair, as well as the equipment necessary for disassembly.
Make sure to have a socket set, wrenches, and a torque wrench on hand, as well as a drain pan and a gasket scraper for disassembly.
It’s important to have all the required tools and equipment ready before you begin the repair process.
Essential Tools for Repair
To repair a lawn mower cracked engine block, you’ll need a set of basic hand tools and safety equipment.
Here are the essential tools and equipment you’ll need:
- Socket Set: A set of sockets and ratchets will be necessary for loosening and tightening bolts and nuts.
- Wrenches: Both open-end and box wrenches in various sizes will help you access and work on different parts of the engine.
- Screwdrivers: Phillips and flathead screwdrivers are essential for removing and reattaching components.
- Safety Gear: Don’t forget to wear safety goggles, gloves, and ear protection to ensure your safety while working with power tools and handling engine parts.
Having these tools on hand will help you efficiently and effectively repair a cracked engine block on your lawn mower.
Equipment for Disassembly
When gathering the necessary tools and equipment for disassembling the lawn mower engine, ensure you have:
- A sturdy workbench or table to provide a stable surface for the disassembly process. This will prevent any accidental damage or movement during the disassembly.
- A set of wrenches, sockets, and screwdrivers in various sizes to accommodate different bolts and screws.
- A torque wrench is essential for accurately tightening bolts during reassembly.
- A rubber mallet on hand to gently tap and loosen any stuck parts.
- A container for organizing and storing the removed parts, such as small plastic bags or labeled containers.
- Safety equipment like gloves and goggles to protect yourself during the disassembly process.
Draining the Engine Oil and Coolant
To drain the engine oil and coolant from a cracked lawn mower engine block, begin by locating the drain plugs for both the oil and the coolant.
The drain plug for the oil is typically located on the bottom of the engine, while the coolant drain plug is often situated at the bottom of the radiator or engine block.
Once you have located the drain plugs, follow these steps:
- Prepare the Lawn Mower: Before draining the oil and coolant, ensure that the lawn mower is on a level surface and cooled down to prevent any accidental burns.
- Drain the Engine Oil: Place an oil pan underneath the oil drain plug and use a wrench to loosen the plug. Allow the oil to drain completely into the pan.
- Drain the Coolant: Position another container under the coolant drain plug and carefully loosen the plug to let the coolant drain out. Make sure to dispose of the old coolant properly.
- Inspect the Drain Plugs: After draining the oil and coolant, inspect the drain plugs for any damage or wear. Replace them if necessary to prevent leaks once you refill the engine.
Preparing the Surface for Repair
Begin by thoroughly cleaning the cracked area of the engine block using a degreaser and a wire brush to remove any dirt, grime, and debris.
Once the area is clean, use a solvent to remove any remaining oil residue. This will ensure that the surface is ready to bond with the repair material.
To engage the audience, here’s a useful table outlining the materials and tools needed for preparing the surface for repair:
| Materials | Tools |
|---|---|
| Degreaser | Wire brush |
| Solvent | Clean cloth |
| Sandpaper | Safety gloves |
| Masking tape | Safety goggles |
The degreaser and wire brush are essential for removing dirt and grime, while the solvent and clean cloth are used to eliminate oil residue.
Sandpaper is helpful for roughening the surface, and masking tape ensures precise application of repair materials.
Lastly, wearing safety gloves and goggles is crucial to protect yourself during this process. Once the surface is properly prepared, you can proceed with repairing the cracked engine block.
Applying the Engine Block Repair Solution
Now it’s time to apply the engine block repair solution.
Start by repairing the crack with epoxy resin, ensuring to follow the manufacturer’s instructions carefully.
This will help ensure a strong and lasting repair.
Repairing With Epoxy Resin
You can start the process of repairing a cracked engine block on your lawn mower by thoroughly cleaning the area with a degreaser and allowing it to dry completely.
Once the area is clean and dry, follow these steps to repair the cracked engine block using epoxy resin:
- Mix the epoxy resin according to the manufacturer’s instructions.
- Apply the epoxy resin to the cracked area, ensuring full coverage.
- Use a putty knife to smooth out the resin and remove any excess.
- Allow the epoxy resin to cure for the recommended time before running the lawn mower.
Follow Manufacturer’s Instructions
Applying the engine block repair solution involves carefully following the manufacturer’s instructions for optimal results in fixing the cracked area.
Before starting, ensure that the engine is cool and the repair area is clean and dry.
Thoroughly mix the repair solution according to the manufacturer’s specifications.
Use a brush or applicator to evenly apply the solution over the cracked area, making sure to cover the entire affected area.
Follow the recommended drying or curing time before testing the repair.
It’s crucial to adhere strictly to the provided instructions to ensure the best possible outcome and prevent further damage.
Deviating from the manufacturer’s guidelines may result in an ineffective repair or cause additional problems.
Always prioritize safety and precision when applying the engine block repair solution.
Testing and Reassembling the Mower
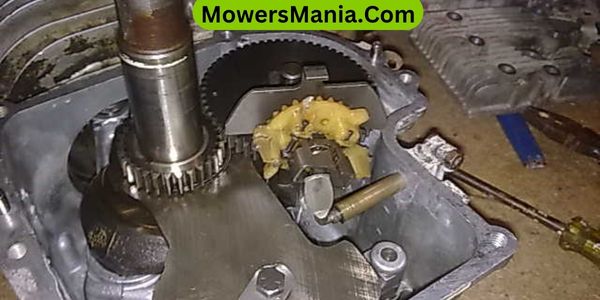
After thoroughly inspecting and repairing the cracked engine block, carefully reassemble the mower, checking each component for proper alignment and functionality.
- Inspect Parts: Before reassembling, inspect all the parts, including gaskets, seals, and bolts, for any damage or wear. Replace any worn or damaged parts to ensure optimal performance.
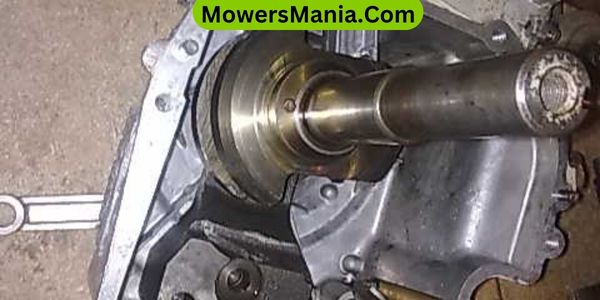
- Proper Alignment: As you reassemble the mower, ensure that all parts are aligned correctly according to the manufacturer’s specifications. Misalignment can lead to inefficiencies or further damage.
- Test Functionality: After reassembly, test the functionality of the mower by starting the engine and observing its performance. Look out for any unusual noises, leaks, or vibrations.
- Final Check: Conduct a final check to ensure that all connections are secure and that there are no loose or forgotten components. This step is crucial for the safety and proper functioning of the mower.
Frequently Asked Questions [FAQs]
Can a Cracked Engine Block Be Repaired Without Removing the Engine From the Lawn Mower?
Yes, you can repair a cracked engine block without removing it from the lawn mower if the crack is small and accessible. You’ll need to use a specialized epoxy or sealant designed specifically for engine block repairs.
Is It Possible to Prevent Future Cracks in the Engine Block After It Has Been Repaired?
To prevent future cracks in the engine block after it’s been repaired, ensure regular maintenance, use quality fuel and oil, avoid overloading, and operate at recommended speeds. Proper storage and handling can also help avoid future issues.
Are There Any Specific Types of Engine Block Repair Solutions That Should Be Avoided?
When repairing a lawn mower engine block, avoid using quick fixes like sealants or epoxy that claim to provide a permanent solution. These can often lead to more extensive damage and compromise the engine’s performance.
How Long Does the Repair Solution Need to Set Before the Engine Can Be Reassembled and Tested?
After applying the repair solution, you should let it set for at least 24 hours before reassembling and testing the engine. This allows the solution to properly cure and bond with the cracked engine block.
Are There Any Additional Maintenance Steps That Should Be Taken After Repairing a Cracked Engine Block to Ensure the Longevity of the Lawn Mower?
After repairing the cracked engine block, you should regularly clean the air filter, change the oil, and inspect the spark plug. Also, keep an eye on the engine’s temperature and listen for any unusual noises while mowing.
Conclusion
So there you have it, repairing a cracked engine block on your lawn mower is definitely doable with the right tools and materials.
By following these steps, you can save yourself the cost of a new mower and get your old one up and running again in no time.
Just remember to take your time and follow the instructions carefully for a successful repair.
Happy mowing!

