If you want to keep your lawn looking its best, you’ll need to make sure your mower blades are sharp. In this article, we’ll show you how to sharpen your lawn mower blades with a grinder.
It’s a simple process that will have your mower cutting through grass like a hot knife through butter. So grab your grinder and let’s get those blades back in top shape!
Safety Precautions
Before you begin sharpening your lawn mower blades with a grinder, ensure that you’re wearing proper safety gear. This includes protective eyewear to shield your eyes from any sparks or debris that may fly off during the sharpening process.
Additionally, make sure to wear heavy-duty gloves to protect your hands from the sharp blade and any potential burns from the grinder.
It’s also crucial to wear ear protection to minimize the loud noise produced by the grinder, which can damage your hearing over time.
Before starting the sharpening process, it’s essential to disconnect the spark plug to prevent the lawn mower from accidentally starting.
This step is critical in ensuring your safety as it eliminates the risk of the mower suddenly turning on while you’re working on the blades.
Furthermore, always work in a well-ventilated area to avoid inhaling any metal particles or dust created during the sharpening process.
Removing the Blades
Now, it’s time to talk about removing the blades.
You’ll learn about different methods for removing the blades and the safety precautions you should take when doing so.
This will ensure that you can safely and effectively prepare the blades for sharpening.
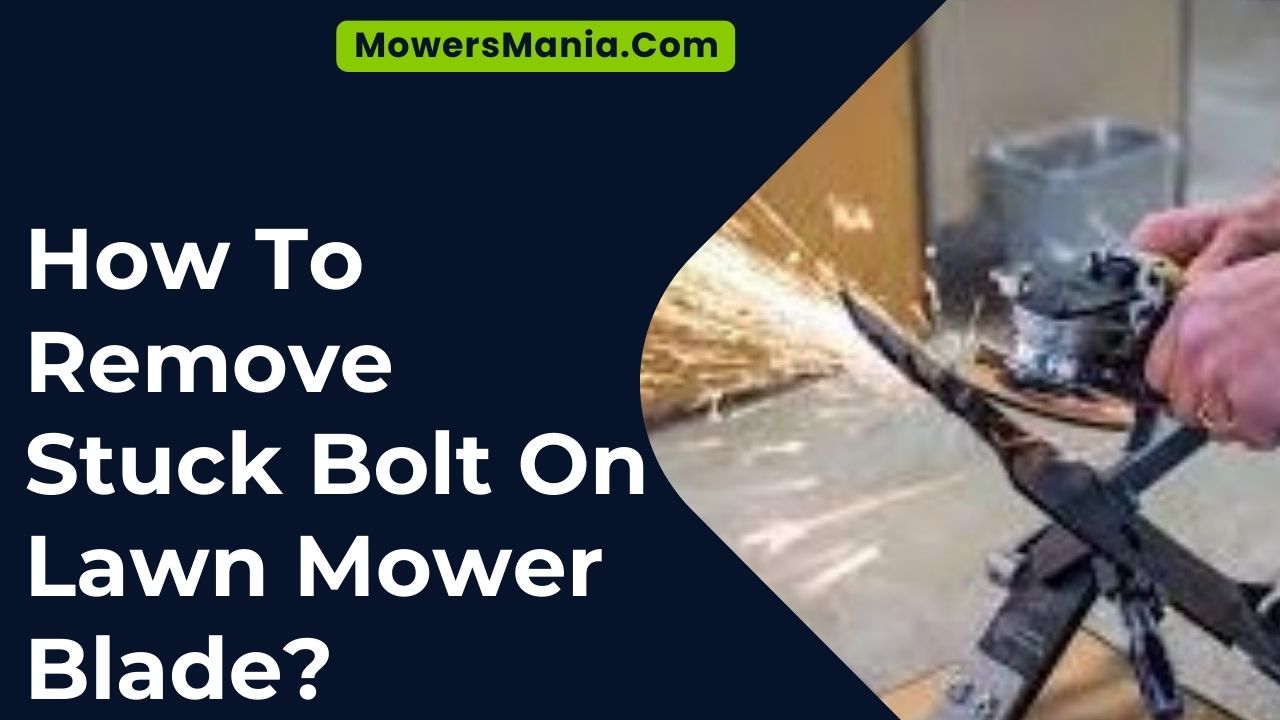
Blade Removal Methods
To remove the blades from your lawn mower, you can use a socket wrench to loosen the bolts holding the blades in place. Start by turning off the mower and disconnecting the spark plug to ensure safety.
Then, tilt the mower on its side, making sure the air filter and carburetor are facing up to prevent oil and fuel from leaking. Locate the bolts that secure the blades to the mower deck.
Place the socket wrench on the bolt head and turn it counterclockwise to loosen and remove the bolts.
Once the bolts are removed, carefully take off the blades from the mower deck. Remember to keep track of which blade is from which side to ensure proper reinstallation.
Now that the blades are removed, you can proceed with sharpening them using a grinder.
Safety Precautions When Removing
When removing the blades from your lawn mower, ensure your safety by following these important safety measures:
- Disconnect the Spark Plug: Before starting any maintenance work on your lawn mower, always disconnect the spark plug to prevent accidental starting.
- Wear Protective Gear: Put on heavy-duty gloves and safety goggles to protect your hands and eyes from any sharp debris or metal fragments.
- Stabilize the Mower: Place the lawn mower on a flat, stable surface to ensure it remains steady while you remove the blades.
Taking necessary precautions will help prevent accidents and injuries. By following these safety measures, you can minimize the risk of accidents and ensure a safe blade removal process.
Cleaning the Blades
After you have removed the lawn mower blades, carefully inspect them for any accumulation of grass clippings, dirt, or rust. Use a stiff brush or a wire brush to scrub off any debris from the blades.
For tough, caked-on grime, you can use a mild detergent or a solution of equal parts water and vinegar to soak the blades before scrubbing. Make sure to dry the blades thoroughly to prevent rusting.
Once the blades are clean and dry, it’s important to apply a light coat of oil to prevent rust and corrosion. You can use a general-purpose lubricating oil or a specific blade oil. Apply the oil evenly to both sides of the blades, making sure to cover the cutting edge as well.
Inspect the blades again after cleaning and oiling to ensure they’re free from any remaining debris or rust. This step is crucial as it ensures that the blades are in optimal condition before sharpening.
Clean and well-maintained blades not only make the sharpening process easier but also contribute to a healthier lawn.
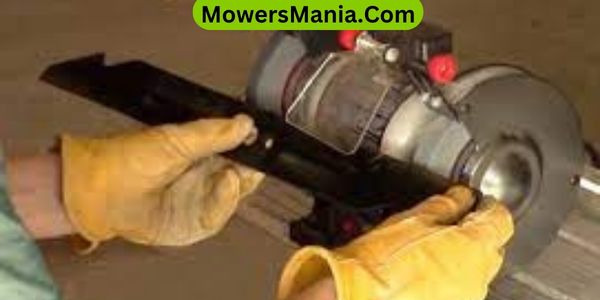
Securing the Blades for Sharpening
To begin, place the secured blade in a vice, ensuring it’s stable and immobile during the sharpening process. Securing the blade properly is crucial for safety and precision.
Here’s how to do it:
- Positioning: Insert the blade into the vice so that it’s held firmly in place. Make sure it’s not wobbling or moving around.
- Tightening: Use the vice’s tightening mechanism to secure the blade. Apply enough pressure to hold it in place, but be cautious not to overtighten and damage the blade.
- Stability: Test the stability of the secured blade by gently trying to move it. If it shifts or wobbles, readjust and tighten the vice until the blade is completely stable.
Remember, a securely held blade is essential for achieving a consistent sharpening result. It also minimizes the risk of accidents during the sharpening process.
Once the blade is securely in place, you can proceed with sharpening it using the grinder, ensuring that you maintain a steady hand and smooth movements for the best results.
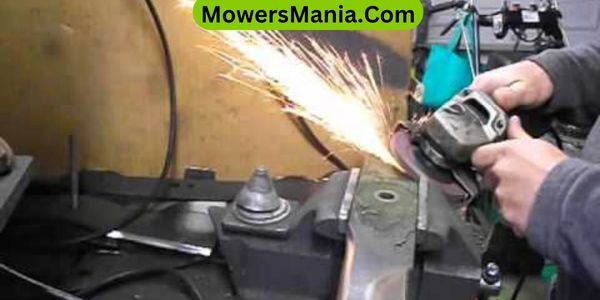
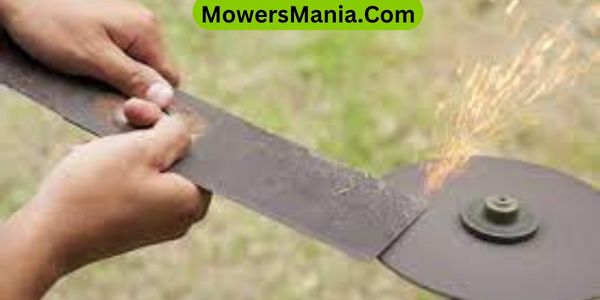
Sharpening Process With the Grinder
Once the blade is securely in place in the vice, you can begin sharpening it with the grinder to ensure a clean, precise cut for your lawn mower.
Start by putting on your safety gear, including gloves and eye protection, to protect yourself from any sparks or metal fragments.
Turn on the grinder and hold it firmly with both hands. Position the grinder at a 45-degree angle to the blade and apply light pressure as you move it along the cutting edge.
Remember to maintain a consistent angle and avoid overheating the blade, as this can cause it to lose its temper.
Take your time and make multiple passes with the grinder until the blade edge is sharp and free of any nicks or dull spots.
Check the sharpness periodically by running your finger lightly along the edge, being cautious not to cut yourself.
Once the blade is adequately sharpened, carefully remove it from the vice and proceed with reinstalling it onto your lawn mower.
Balancing the Blades
You can check for blade balance by using a nail and a wall. Simply, drive a nail into a wall at a comfortable working height.
Then, hang the center hole of the blade onto the nail. If the blade is balanced, it should hang level. If one side dips lower than the other, it indicates that the blade is unbalanced and needs further attention.
To balance the blade properly, you can follow these steps:
- Remove Material: If one side of the blade is dipping lower than the other, you can use a file or grinder to carefully remove small amounts of metal from the heavier end. Keep checking the balance frequently to avoid overcorrection.
- Use a Blade Balancer: Invest in a blade balancer, which is a simple tool designed specifically for this task. It can help you identify which side of the blade is heavier and needs adjustment.
- Check Regularly: After balancing the blade, it’s important to recheck the balance periodically. Continuous use can cause the blade to become unbalanced again, so regular maintenance is key to keeping your mower in top condition.
Reinstalling the Blades

After sharpening the lawn mower blades, carefully reattach them to the mower deck using a socket wrench. Start by aligning the blades properly with the mower deck, ensuring that they’re facing the correct direction.
Slide the blade bolts through the pre-drilled holes in the mower deck and the blades. Use the socket wrench to tighten the blade bolts securely.
It’s essential to tighten the bolts to the manufacturer’s recommended torque specifications to ensure that the blades are properly secured.
Once the blades are securely attached, lower the mower deck back to its original position, making sure it’s properly aligned and securely fastened.
Double-check that the blades are spinning freely without any obstructions. After reinstalling the blades, it’s a good practice to run the lawn mower for a few minutes to ensure that everything is functioning correctly.
If you notice any unusual vibrations or noises, immediately turn off the mower and inspect the blades for proper installation and balance.
Reinstalling the blades correctly is crucial for the safe and efficient operation of your lawn mower. Following these steps ensures that your mower will be ready to deliver a clean and precise cut to your lawn.
Frequently Asked Questions (FAQs]
Can I Use a Regular Bench Grinder to Sharpen My Lawn Mower Blades, or Do I Need a Specific Type of Grinder?
You can use a regular bench grinder to sharpen your lawn mower blades. Just make sure to use a grinding wheel specifically designed for the task. It’s important to maintain the correct angle for optimal performance.
How Often Should I Sharpen My Lawn Mower Blades, and Are There Any Signs That Indicate They Need Sharpening?
You should sharpen your lawn mower blades at least once a year, but more frequent use may call for more frequent sharpening. Signs that indicate they need sharpening include uneven cuts, ragged grass tips, or visible nicks.
Is It Necessary to Wear a Face Mask or Respirator While Sharpening the Blades With a Grinder?
When sharpening the blades with a grinder, it’s crucial to wear a face mask or respirator for protection. The grinder creates fine metal particles that can be harmful if inhaled. Prioritize safety by wearing the appropriate gear.
Are There Any Specific Angles or Techniques I Should Use When Sharpening the Blades With a Grinder?
When sharpening the blades with a grinder, ensure you maintain the manufacturer’s recommended angle. Use a vice to secure the blade and a steady hand to maintain the angle. Always wear eye protection.
Can I Sharpen Severely Damaged or Bent Blades With a Grinder, or Should I Replace Them Instead?
You can sharpen severely damaged or bent blades with a grinder, but it’s essential to assess if the damage is repairable before doing so. If the blade is too damaged, it’s best to replace it for safety and efficiency.
Conclusion
Now that you’ve learned how to sharpen your lawn mower blades with a grinder, you can ensure a clean and precise cut for your lawn.
Remember to always prioritize safety by wearing protective gear and following the proper steps for removing, cleaning, sharpening, and reinstalling the blades.
With sharp and balanced blades, your lawn mower will be more efficient and effective in maintaining a well-groomed lawn.
Happy mowing!

