When it comes to testing your lawn mower battery without a multimeter, it’s like learning to read the signs. You can easily check the battery’s health using simple methods.
A visual inspection can reveal any visible damage or corrosion.
Then, performing a load test will assess the battery’s ability to hold a charge under pressure.
You can also conduct a voltage test to measure the battery’s power output.
Additionally, checking the electrolyte levels, cranking the engine, and examining for any unusual odors or corrosion can provide valuable insights.
By following these steps, you can quickly determine the condition of your lawn mower battery without the need for a multimeter.
Visual Inspection
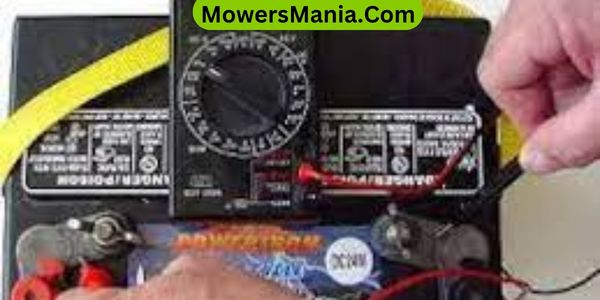
To inspect the lawn mower battery visually, carefully examine the battery terminals for any signs of corrosion or buildup.
Start by locating the battery, usually found under the seat or hood of the mower. Once you’ve found it, take a close look at the terminals.
Corrosion can appear as a white, powdery substance on the metal terminals, while buildup may look like a crusty, dark deposit. If you notice any of these signs, it’s an indication that the battery may be failing.
Next, check the battery casing for any cracks or leaks. A damaged casing could lead to acid leaks, which can affect the battery’s performance.
Additionally, make sure the battery cables are securely connected to the terminals. Loose connections can cause issues with the battery’s ability to hold a charge.
Load Testing
When load testing a lawn mower battery, you’ll first need to understand the purpose behind this type of test.
Then, you’ll follow a specific load test procedure to ensure accurate results.
Purpose of Load Testing
You can determine the condition of your lawn mower battery by subjecting it to a load test. Load testing serves the purpose of evaluating the battery’s ability to maintain a steady voltage under a load, simulating the real-world demands it will face during operation.
Here’s why load testing is important:
- Assess Battery Health: Load testing allows you to gauge the overall health and performance of the battery.
- Identify Weaknesses: It helps in identifying any weaknesses or degradation in the battery’s capacity to deliver power.
- Prevent Failures: By uncovering potential issues, load testing can prevent unexpected battery failures during mowing.
- Ensure Reliable Performance: Ultimately, load testing ensures that your lawn mower battery can reliably meet the demands of powering the mower.
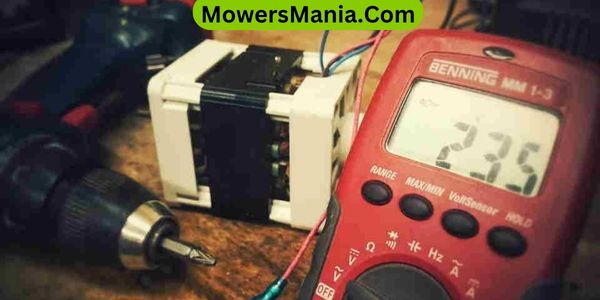
Load Test Procedure
Performing a load test on your lawn mower battery is an important step in assessing its performance and health. This test can help you determine if the battery needs to be replaced or if it is still in good condition.
To start the load test, make sure the battery is fully charged. Once it is charged, connect a load tester to the terminals of the battery.
Next, you will need to crank the engine for 15 seconds while the load tester measures the voltage. If the voltage drops below 9.6 volts during this test, it may be a sign that the battery needs to be replaced.
After completing the test, recharge the battery and repeat the load test. If the voltage still drops below 9.6 volts, it is a clear indication of a weak or failing battery.
On the other hand, if the voltage remains above 9.6 volts during the test, it is likely that the battery is in good condition.
Regularly performing load tests on your lawn mower battery can help prevent unexpected battery failures and ensure reliable performance. It is an important maintenance step to keep your lawn mower running smoothly.
Interpreting Test Results
After completing the load test on your lawn mower battery, it’s important to interpret the test results accurately to determine the battery’s condition and performance.
Here’s how to interpret the results:
- Strong Performance: If the battery maintains a voltage above 12.4 volts during the load test, it indicates a strong and healthy battery.
- Moderate Performance: If the voltage drops to 11.8-12.4 volts during the load test, the battery’s performance is moderate, and it may need recharging or eventual replacement.
- Weak Performance: A voltage drop to 11.7 volts or below indicates a weak battery that requires immediate attention and likely replacement.
- No Voltage Drop: If there’s no significant voltage drop during the load test, it suggests a problem with the charging system rather than the battery itself.
Voltage Testing
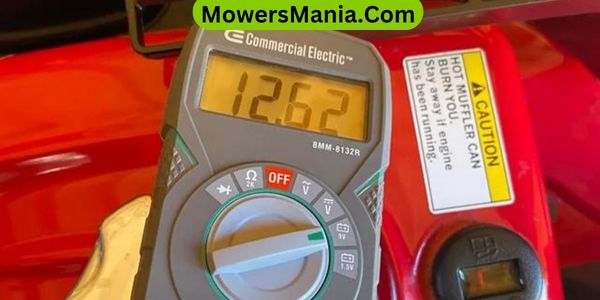
To conduct a voltage test on your lawn mower battery, simply attach the voltmeter’s probes to the battery terminals. Make sure to set the voltmeter to the DC voltage setting, typically indicated by a “V” with straight and dotted lines above it.
Once the probes are connected, the voltmeter will display the battery’s voltage. Compare the reading to the manufacturer’s specifications to determine if the battery is holding a charge within the acceptable range.
To help you understand the voltage readings and what they mean for your lawn mower battery, refer to the table below:
| Voltage Reading | Battery Condition |
|---|---|
| 12.6V or above | Fully charged |
| 12.4V – 12.6V | 75-100% charged |
| Below 12.4V | Requires charging |
Electrolyte Testing
To test the health of your lawn mower battery, start by checking the color of the electrolyte. A healthy battery should have clear or light yellow electrolyte, while a dark or murky color could indicate a problem.
Additionally, you can use a hydrometer to measure the specific gravity of the electrolyte, which provides a good indication of the battery’s state of charge.
Electrolyte Color Check
Check the electrolyte color of your lawn mower battery to assess its condition easily. The color of the electrolyte can provide valuable insights into the state of your battery.
Here’s how to interpret the electrolyte color:
- Clear or Light Yellow: Indicates a healthy battery with a proper balance of water and acid.
- Dark Brown or Black: Suggests that the battery is overheating or overcharging, potentially leading to reduced lifespan.
- Cloudy or White: Signifies that the battery might be overcharged, leading to water loss and potential damage to the internal plates.
- Reddish or Rusty Color: Indicates possible internal damage or a failing battery, requiring immediate attention or replacement.
Specific Gravity Measurement
Assess the health of your lawn mower battery by performing specific gravity measurement, allowing you to further understand its condition without the need for a multimeter.
To begin, use a hydrometer to draw a small amount of electrolyte from each cell of the battery. Hold the hydrometer steady and take the reading, ensuring the float inside the hydrometer is free from any obstructions.
Compare the specific gravity readings to the manufacturer’s specifications to determine if the battery is still in good condition. If the readings are below the recommended levels, it indicates that the battery may be discharged or nearing the end of its lifespan.
Regularly checking the specific gravity of your lawn mower battery can help you anticipate any potential issues and maintain its performance.
Cranking Test
Before attempting a cranking test on your lawn mower battery, ensure that all safety precautions have been taken. The cranking test helps determine the battery’s ability to deliver power to the engine for starting.
Here’s how to perform the cranking test:
- Prepare the Mower: Place the mower in a well-ventilated outdoor area, engage the parking brake, and ensure the blades are disengaged.
- Check Battery Connections: Inspect the battery terminals for corrosion or loose connections. Clean and tighten the terminals if necessary.
- Perform the Test: Turn the ignition key to start the engine and observe the cranking speed. If the engine cranks slowly or struggles to start, the battery may be weak or failing.
- Interpret the Results: A strong and consistent cranking speed indicates a healthy battery, while slow or erratic cranking suggests the need for a battery replacement.
Odor and Corrosion Check
Inspect the battery terminals for any signs of odor or corrosion. If you notice a sulfurous or rotten egg smell, it could indicate a leaking or damaged battery.
Additionally, look for any white, green, or powdery buildup on the terminals. This corrosion can prevent the battery from functioning properly and may indicate a need for cleaning or replacement.
To help you understand what to look for when inspecting the battery terminals, here is a simple table outlining the signs of potential issues:
| Signs of Potential Issues |
|---|
| Sulfurous or rotten egg odor |
| White, green, or powdery buildup on terminals |
| Corrosion spreading to nearby components |
Frequently Asked Questions [FAQs]
Can a Lawn Mower Battery Be Tested Without Removing It From the Mower?
You can easily test a lawn mower battery without removing it from the mower. Simply use a load tester or a hydrometer to check the battery’s capacity and state of charge. These methods are quick and effective.
Is It Possible to Overcharge a Lawn Mower Battery?
Yes, you can overcharge a lawn mower battery. Leaving it on the charger for too long can damage the battery and reduce its lifespan. Make sure to follow the manufacturer’s recommendations for charging times.
What Are Some Common Signs That a Lawn Mower Battery Needs to Be Replaced?
If your lawn mower battery frequently needs jump-starting, shows signs of corrosion, or turns the engine slowly, it may need replacing. Keep an eye out for these issues to ensure your lawn mower runs smoothly.
Are There Any Safety Precautions to Keep in Mind When Testing a Lawn Mower Battery?
When testing a lawn mower battery, always wear protective gear and avoid sparks or flames. Make sure the battery is securely connected, and use caution with any tools or equipment. Safety first!
How Often Should a Lawn Mower Battery Be Checked and Tested for Optimal Performance?
You should check and test your lawn mower battery at least once a month to ensure optimal performance. Regular maintenance helps prevent unexpected failures and extends the life of the battery, keeping your mower running smoothly.
Conclusion
So there you have it, testing a lawn mower battery without a multimeter is easy and can be done using simple visual, load, voltage, electrolyte, cranking, odor, and corrosion tests.
By following these steps, you can quickly determine the condition of your lawn mower battery and ensure that it’s ready to power your equipment.
Keep your lawn mower running smoothly and efficiently with regular battery testing.

