If your lawn mower is sputtering and struggling to start, it might be time to give the carburetor some attention. In this article, you’ll learn how to use carburetor cleaner to keep your lawn mower running smoothly.
We’ll guide you through the process of removing, cleaning, and reassembling the carburetor, as well as provide some maintenance tips to ensure your mower stays in top shape.

Let’s get started!
Understanding the Carburetor
To understand the carburetor, first, you need to grasp its primary function in mixing air and fuel for combustion in the engine. The carburetor plays a crucial role in ensuring the proper air-fuel mixture reaches the engine cylinders for combustion.
As air enters the carburetor, it mixes with the fuel in the correct proportion before entering the engine. This mixture is essential for the engine to run smoothly and efficiently.
When you start the engine, the carburetor regulates the amount of air and fuel entering the engine. It adjusts the mixture based on the engine’s speed and load, ensuring optimal performance.
Understanding this process is vital for maintaining and troubleshooting the carburetor. If the air-fuel mixture is off, it can lead to issues such as rough idling, poor acceleration, or even engine stalling.
Additionally, the carburetor’s design includes various components such as jets, needles, and floats, each playing a specific role in the mixture’s regulation.
By comprehending how these components work together, you can troubleshoot and adjust the carburetor to keep your engine running smoothly.
Gathering the Necessary Tools
You’ll need a socket wrench, carburetor cleaner, safety goggles, and gloves. These tools are essential for safely and effectively cleaning your lawn mower’s carburetor. The socket wrench will be used to remove the bolts securing the carburetor in place.
Carburetor cleaner is necessary to dissolve any built-up residue and debris within the carburetor. Safety goggles are crucial for protecting your eyes from any cleaning solution or debris that may splash during the process.
Additionally, wearing gloves will shield your hands from any harsh chemicals and prevent skin irritation.
Having these tools ready before you begin the carburetor cleaning process will ensure that you can work efficiently without interruption. It’s important to gather these items in advance to avoid any potential delays or safety hazards.
Once you have all the necessary tools assembled, you’ll be fully prepared to move on to the next steps in the carburetor cleaning process.
Removing the Air Filter and Carburetor Cover
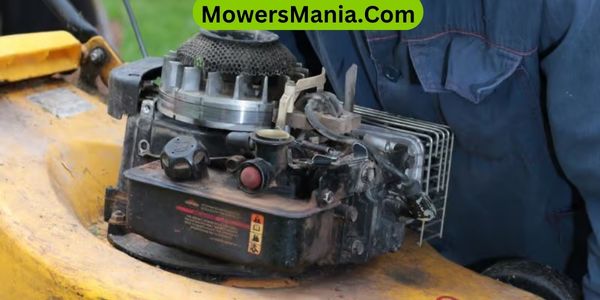
Once you have gathered the necessary tools, remove the air filter and carburetor cover from the lawn mower. Start by locating the air filter, typically housed in a plastic or metal compartment near the carburetor.
Use a screwdriver to loosen the screws or bolts securing the air filter cover. Once the cover is off, gently take out the air filter.
If it’s a foam filter, wash it with warm, soapy water, then let it dry completely before reinstallation. If it’s a paper filter, replace it with a new one if it’s dirty or damaged.
Next, locate the carburetor cover, usually situated near the air filter. Use a screwdriver to remove the screws or bolts holding the cover in place.
Once the cover is off, you’ll have access to the carburetor. Take a moment to inspect the carburetor for any visible dirt or debris, which may require cleaning with carburetor cleaner. Remember to handle all parts with care to avoid damage.
With the air filter and carburetor cover removed, you’re now ready to proceed with cleaning the carburetor using the appropriate cleaner.
Cleaning the Carburetor With Carburetor Cleaner
When cleaning the carburetor with carburetor cleaner, it’s important to ensure that all built-up residue and debris are thoroughly removed.
To do this, follow the steps for using the cleaner and take the necessary safety precautions to prevent any mishaps.
Importance of Cleaning
Cleaning the carburetor with carburetor cleaner is essential for maintaining the performance of your lawn mower. Regular cleaning ensures that the engine runs smoothly and efficiently, preventing issues such as stalling or rough idling.
Here’s why cleaning the carburetor with carburetor cleaner is so important:
- Improved Fuel Efficiency: A clean carburetor allows for proper fuel and air mixture, optimizing fuel consumption and saving you money on gas.
- Tip: Who doesn’t love saving a few bucks at the pump?
- Extended Engine Life: By removing built-up gunk and varnish, you can prevent damage to vital engine components, prolonging the life of your mower.
- Tip: Think of it as giving your mower a long and healthy life!
Steps for Using
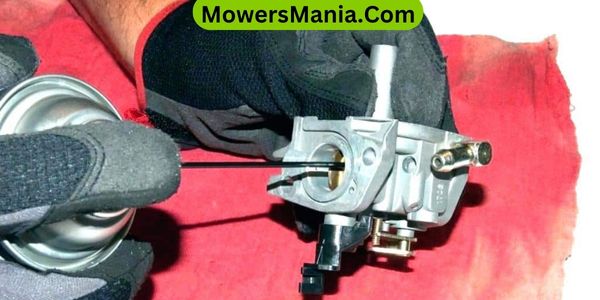
To begin cleaning the carburetor with carburetor cleaner, you’ll need to remove the air filter housing from the lawn mower. Once the air filter housing is removed, locate the carburetor, which is typically positioned near the engine.
Next, use a screwdriver to carefully loosen the screws holding the carburetor in place and gently detach it from the mower.
With the carburetor removed, spray the inside and outside with carburetor cleaner, focusing on areas with visible dirt or grime. Allow the cleaner to penetrate and dissolve the deposits for a few minutes.
Afterward, use a clean cloth or brush to gently scrub the carburetor, ensuring all debris is removed. Once cleaned, reattach the carburetor to the mower and put back the air filter housing.
Safety Precautions to Consider
Before starting the cleaning process, you should ensure that the lawn mower is turned off and cool to the touch to prevent any accidental ignition of the carburetor cleaner.
Safety precautions to consider when cleaning the carburetor with carburetor cleaner include:
- Protective Gear
- Wear gloves and safety goggles to shield your hands and eyes from the cleaner and any debris that may come loose during the cleaning process.
- Well-Ventilated Area
- Work in a well-ventilated outdoor space to prevent inhalation of fumes. Avoid enclosed areas to minimize the risk of exposure to potentially harmful vapors.
Reassembling the Carburetor
After cleaning all the carburetor components, reassemble them in the reverse order of disassembly, ensuring each part is securely fitted.
Start by placing the cleaned float and needle valve back into the carburetor body, followed by the reattachment of the float bowl. Make sure to tighten the bowl securely to prevent any leaks.
Next, reinstall the cleaned air filter and secure it tightly with the appropriate screws or clips. Then, carefully put the throttle plate and choke plate back in their respective positions, ensuring they move freely.
After that, attach the cleaned fuel line and secure it with a clamp to prevent any fuel leaks. Once all the parts are in place, carefully reattach the carburetor to the engine, ensuring that all linkages and gaskets are properly aligned and in good condition.
Testing the Lawn Mower
Once you have reassembled the carburetor, you can test the lawn mower by starting the engine and observing the idle and throttle response.
Here’s how you can do it:
- Start the Engine:
After reassembling the carburetor, prime the engine by pressing the primer bulb 3-5 times. Then, set the throttle to the ‘Start’ position and pull the starter cord to start the engine.
- Observe the Idle and Throttle Response:
Once the engine is running, observe the idle speed. It should be steady and not too high or too low. If the idle speed is too high or low, you may need to adjust the idle screw on the carburetor.
Next, move the throttle lever through its full range from idle to full throttle. The engine should respond smoothly and without hesitation.
If the engine hesitates or stalls during acceleration, it may indicate a problem with the carburetor adjustment or fuel delivery.
Maintenance Tips for Carburetor Care
To keep your lawn mower running smoothly, it’s important to regularly clean the carburetor for optimal efficiency and performance.
Additionally, preventing carburetor buildup by using quality gasoline and storing the mower properly can help extend the life of the carburetor.
Cleaning Carburetor for Efficiency
To maintain optimal efficiency, regularly clean the carburetor of your lawn mower using a quality carburetor cleaner.
Here are some maintenance tips for caring for your carburetor:
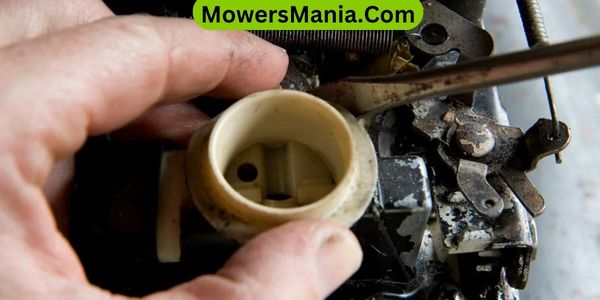
- Regular Inspection:
Check for any signs of dirt, debris, or varnish buildup in the carburetor.
- Cleaning Schedule:
Plan a regular cleaning schedule based on your usage frequency. For heavy usage, consider cleaning the carburetor every 3 months, while for lighter usage, every 6 months may be sufficient.
Regularly cleaning your carburetor will ensure that your lawn mower operates efficiently, leading to better performance and a longer lifespan.
By following these maintenance tips, you’ll keep your carburetor in top condition and your lawn mower running smoothly.
Preventing Carburetor Buildup
Regularly inspecting the carburetor for any signs of dirt, debris, or varnish buildup is essential for preventing carburetor buildup and maintaining optimal efficiency in your lawn mower. In addition, always use clean, fresh fuel and consider adding a fuel stabilizer to prevent the formation of gum and varnish in the carburetor.
It’s important to follow the manufacturer’s guidelines for oil changes and air filter replacements to ensure proper engine function and minimize the risk of carburetor issues.
Furthermore, when storing your lawn mower for an extended period, drain the fuel or use a fuel stabilizer to prevent fuel from deteriorating and causing buildup in the carburetor.
Lastly, consider having a professional tune-up annually to keep the carburetor and the entire engine in top condition.
Frequently Asked Questions [FAQs]
Can I Use Carburetor Cleaner on a Lawn Mower With a Fuel Injection System Instead of a Carburetor?
You can’t use carburetor cleaner on a lawn mower with fuel injection instead of a carburetor. Fuel injection systems require specific cleaners designed for that purpose. Using the wrong cleaner can cause damage.
Is It Safe to Use Carburetor Cleaner on Plastic or Rubber Parts of the Lawn Mower?
Yes, it’s safe to use carburetor cleaner on metal parts of the lawn mower, but avoid spraying it directly on plastic or rubber components, as it can cause damage. Instead, use a cleaner specifically designed for those materials.
How Often Should I Clean the Carburetor of My Lawn Mower?
You should clean the carburetor of your lawn mower at least once a year to ensure optimal performance. Regular cleaning helps prevent clogs and extends the lifespan of your mower’s engine.
Can I Use Any Type of Carburetor Cleaner for My Lawn Mower, or Are There Specific Brands or Types I Should Use?
You should use a specific type of carburetor cleaner for your lawn mower. Some brands are designed for small engines and will work better. Always check the label and follow the manufacturer’s recommendations for best results.
Are There Any Specific Safety Precautions I Should Take When Using Carburetor Cleaner on My Lawn Mower?
When using carburetor cleaner on your lawn mower, always wear protective gloves and eyewear. Work in a well-ventilated area and avoid smoking or using the cleaner near open flames. Follow the specific safety instructions on the cleaner’s label.
Conclusion
Now that you’ve cleaned your lawn mower’s carburetor, your mower should be running smoothly and efficiently.
Remember to regularly maintain your carburetor to keep your lawn mower in top condition.
By understanding how the carburetor works and following these simple steps, you can ensure that your lawn mower continues to perform at its best.
Happy mowing!

